Invite or add your managers and manage their permissions.
Table of contents
Introduction
Since the introduction of manager permissions you have the ability to control and manage exactly which parts of CrewPlanner a manager is allowed access to and which actions they can take. Through our partnership with Stripe we now also give you full control over the number of managers you would like and which type.
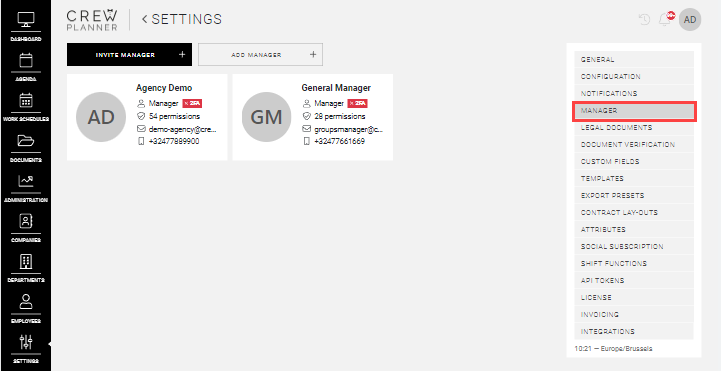
You can consult your manager usage in the section License in settings to verify how many managers you still have available in your plan. To manage your managers however, you navigate to the MANAGER section in SETTINGS.
How to invite a manager
You have two ways to create additional manager profiles, you can invite them or if you already have the necessary information, add them. We will first explain how to invite a new manager.
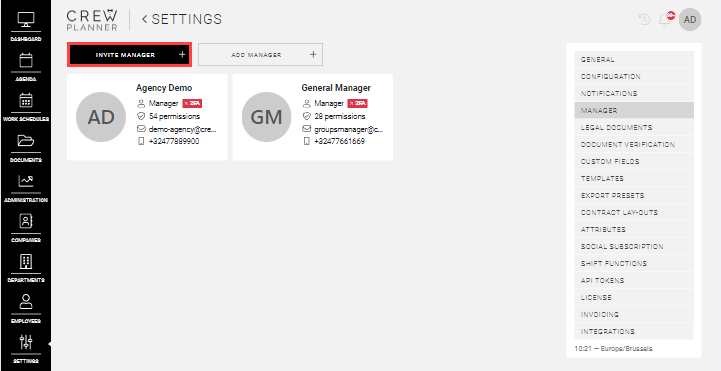
To do so, navigate to the MANAGER page in SETTINGS and select at the top left INVITE MANAGER.
This will open a new page where you will be able to add one or more managers with the same permissions.
Depending on the status of your manager usage, you will be notified if you have reached the limit of the number of managers included in your plan. Note that once you have reached this limit, you will be charged on a monthly basis for each additional manager. This charge will be added to the next following invoices.
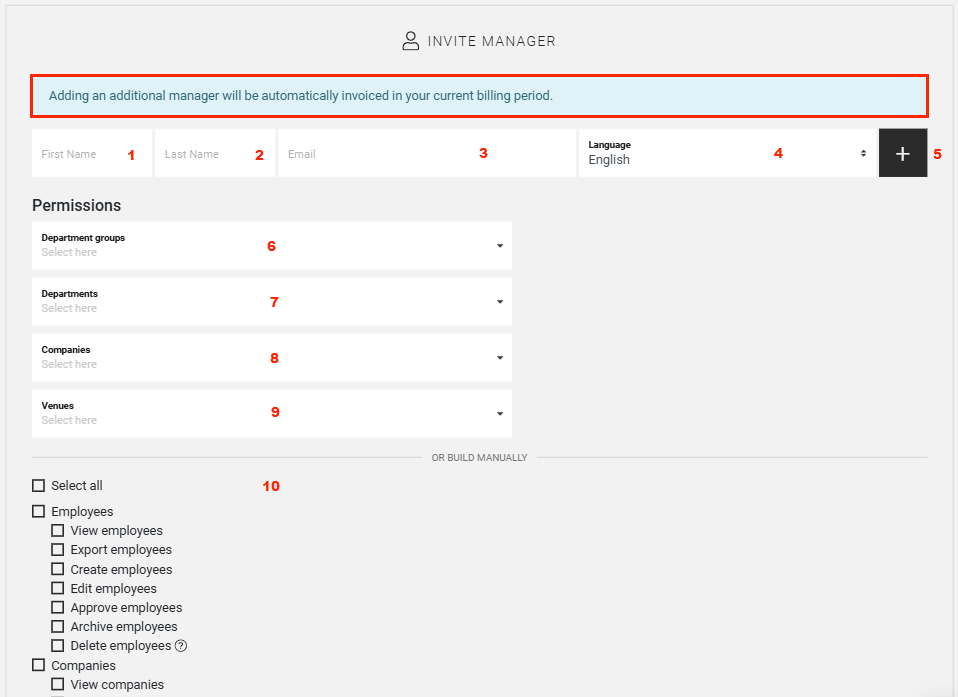
To add a manager you complete the following information:
-
First name
-
Last name
-
Email
CrewTip! To prevent possible difficulties, we strongly recommend not to use a same email address of an existing CrewPlanner account. Even if used for an employee account.
-
Language: select the language in which they will receive the invitation.
-
Plus icon: select to add multiple colleagues with the same permissions.
-
Department groups: select the department groups which they are allowed to manage or make no selection if they are allowed to manage all current and future department groups.
CrewTip! If a manager is only allowed to manage (a) specific department(s), select only the department(s) and not the group(s).
-
Departments: select the departments they are allowed to manage or make no selection if they are allowed to manage all current and future departments.
CrewTip: Please note, managers who only have access to specific groups or departments will not be able to see data that isn't connected to their groups of departments. Projects awaiting approval, where departments are unknown, newly registered employees with no attached departments, or inactive employees, will not be visible for a manager with restricted access to one or more groups or departments.
-
Companies: select the companies they are allowed to manage or make no selection if they are allowed to manage all current and future companies.
-
Venues: select the venues they are allowed to manage or make no selection if they are allowed to manage all current and future venues.
CrewTip! When permissions have been restricted to one or more venues, the manager will no longer have access to the COMPANIES page in the menubar, but will have a VENUES page instead.
-
Permissions: tick the box to add the appropriate permission.
First name
Last name
CrewTip! To prevent possible difficulties, we strongly recommend not to use a same email address of an existing CrewPlanner account. Even if used for an employee account.
Language: select the language in which they will receive the invitation.
Plus icon: select to add multiple colleagues with the same permissions.
Department groups: select the department groups which they are allowed to manage or make no selection if they are allowed to manage all current and future department groups.
CrewTip! If a manager is only allowed to manage (a) specific department(s), select only the department(s) and not the group(s).
Departments: select the departments they are allowed to manage or make no selection if they are allowed to manage all current and future departments.
CrewTip: Please note, managers who only have access to specific groups or departments will not be able to see data that isn't connected to their groups of departments. Projects awaiting approval, where departments are unknown, newly registered employees with no attached departments, or inactive employees, will not be visible for a manager with restricted access to one or more groups or departments.
Companies: select the companies they are allowed to manage or make no selection if they are allowed to manage all current and future companies.
Venues: select the venues they are allowed to manage or make no selection if they are allowed to manage all current and future venues.
CrewTip! When permissions have been restricted to one or more venues, the manager will no longer have access to the COMPANIES page in the menubar, but will have a VENUES page instead.

Permissions: tick the box to add the appropriate permission.
CrewTip! Note, when you select the permission Contact CrewPlanner support, the manager will become a support manager (SPOC). If the number of support managers included in your plan has been reached, you will receive below notification. When you invite additional support managers, you will be charged on a monthly basis for each additional manager. This charge will be added to the next following invoices.

Select SEND INVITATION to invite the manager(s).
In the overview the manager’s card will display the label Invited until they have completed their registration.

How to add a manager
When you have the necessary information, you can choose to add a manager on the MANAGER page.
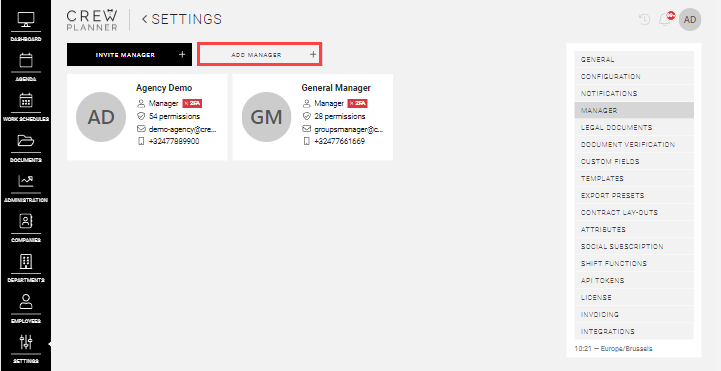
To do so, select ADD MANAGER on top and this will open a new page.
Depending on the status of your manager usage, you will be notified if you have reached the limit of the number of managers included in your plan. Note that once you have reached this limit, you will be charged on a monthly basis for each additional manager. This charge will be added to the next following invoices.
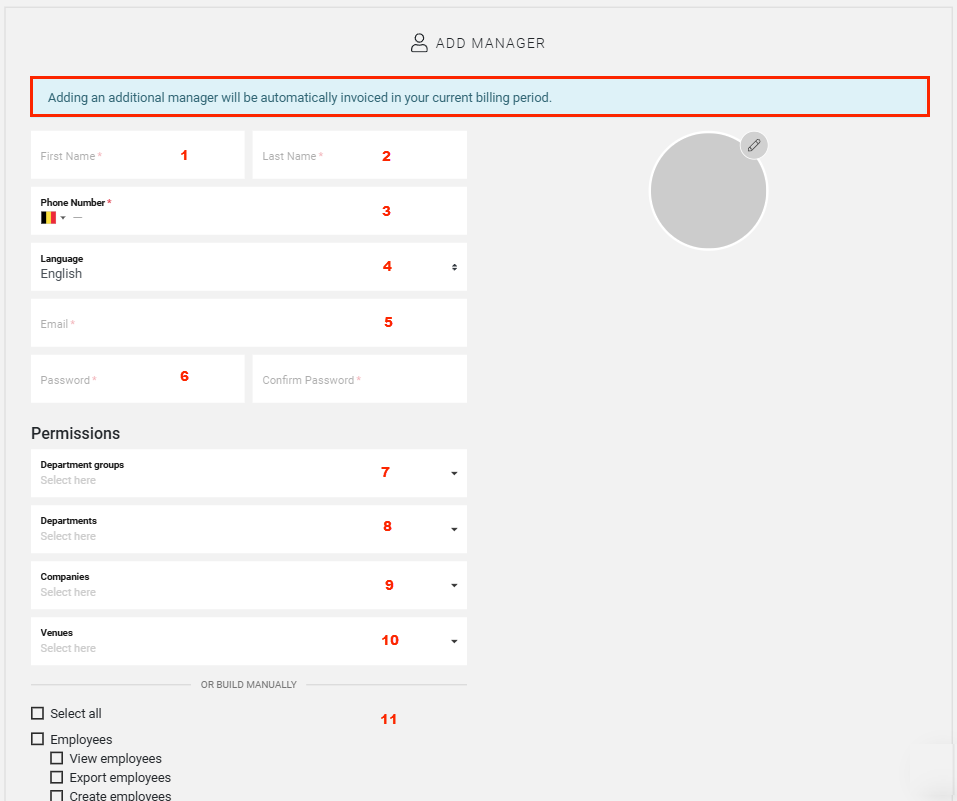
Complete the information:
-
First name
-
Last name
-
Phone number
-
Language: select the language of their account, they will still be able to change this.
-
Email
CrewTip! To avoid potential complications, we strongly advise you not to use the same e-mail address from an existing CrewPlanner account. Even if this was used for an employee account.
-
Password: select a password, the manager will have to change this again when logging into their account.
-
Department groups: select the department group(s) the manager is allowed to manage or make no selection if they are allowed to manage all current and future groups.
-
Departments: select the department(s) the manager is allowed to manage or make no selection if they are allowed to manage all current and future departments.
CrewTip: Please note, managers who only have access to specific groups or departments will not be able to see data that isn't connected to their groups of departments. Projects awaiting approval, where departments are unknown, newly registered employees with no attached departments, or inactive employees, will not be visible for a manager with restricted access to one or more groups or departments.
-
Companies: select the companies they are allowed to manage or make no selection if they are allowed to manage all current and future companies.
-
Venues: select the venues they are allowed to manage or make no selection if they are allowed to manage all current and future venues.
-
Permissions: tick the box to add the appropriate permission or select a permission preset if you have created any.
CrewTip! Note, when you select the permission Contact CrewPlanner support, the manager will become a support manager (SPOC). If the number of support managers included in your plan has been reached, you will receive below notification. When you invite additional support managers, you will be charged on a monthly basis for each additional manager. This charge will be added to the next following invoices.
First name
Last name
Phone number
Language: select the language of their account, they will still be able to change this.
CrewTip! To avoid potential complications, we strongly advise you not to use the same e-mail address from an existing CrewPlanner account. Even if this was used for an employee account.
Password: select a password, the manager will have to change this again when logging into their account.
Department groups: select the department group(s) the manager is allowed to manage or make no selection if they are allowed to manage all current and future groups.
Departments: select the department(s) the manager is allowed to manage or make no selection if they are allowed to manage all current and future departments.
CrewTip: Please note, managers who only have access to specific groups or departments will not be able to see data that isn't connected to their groups of departments. Projects awaiting approval, where departments are unknown, newly registered employees with no attached departments, or inactive employees, will not be visible for a manager with restricted access to one or more groups or departments.
Companies: select the companies they are allowed to manage or make no selection if they are allowed to manage all current and future companies.
Venues: select the venues they are allowed to manage or make no selection if they are allowed to manage all current and future venues.
Permissions: tick the box to add the appropriate permission or select a permission preset if you have created any.
CrewTip! Note, when you select the permission Contact CrewPlanner support, the manager will become a support manager (SPOC). If the number of support managers included in your plan has been reached, you will receive below notification. When you invite additional support managers, you will be charged on a monthly basis for each additional manager. This charge will be added to the next following invoices.

You add the manager by selecting ADD.
Impersonate a manager
Similar as with employee cards, if you move your cursor over a manager card, a shield and pencil icon appear in the top right corner.
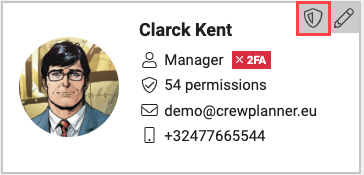
Select the shield icon to impersonate this manager to experience what they see and experience.
A banner will be displayed on top of every page, indicating that you are logged in as this person.

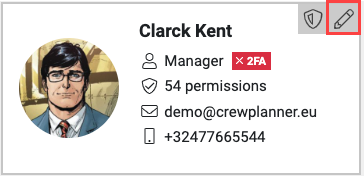
Edit a manager profile
On the MANAGER page in SETTINGS, select the pencil icon to edit the manager profile.
The profile will open, and you will be able to edit their information and permissions.
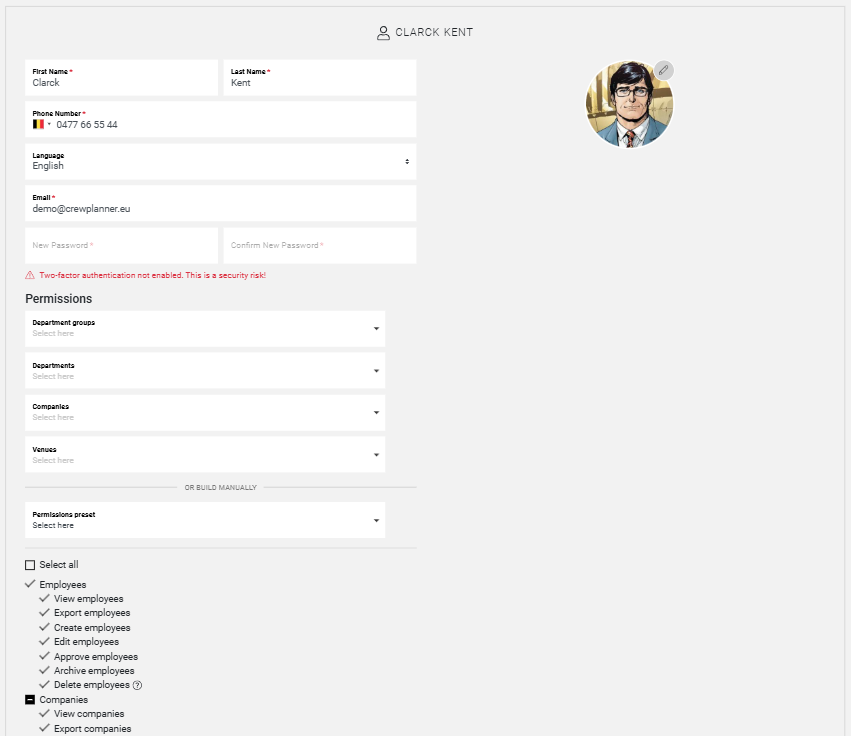
Remember to select SAVE on the bottom of the page to apply any changes.
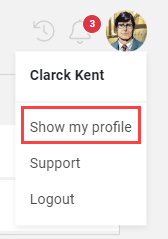
CrewTip! If you wish to modify your own profile, such as your language setting, you can always select your profile picture in the top right corner, followed by Show my Profile, to open and edit your manager profile.
Delete a manager profile
You are also able to delete a manager profile, which similar to adding managers, will be applied immediately to your next invoice calculation.
Follow the same steps to edit a profile and on the bottom of the profile next to the save button, you will find the option DELETE USER.

After your confirmation, the account will be deleted.
CrewTip: Once a manager is deleted, it is not possible to reactivate the profile. A new profile will have to be created.
Moreover, not to worry, deleting a manager's profile does not delete the information created by them.
We hope this article has helped you!
If you still have questions, take a look at our Crew Academy first. You might find the answer in one of our articles.