Table of contents
Change cover image of a project
Remove cover image from a project
Introduction
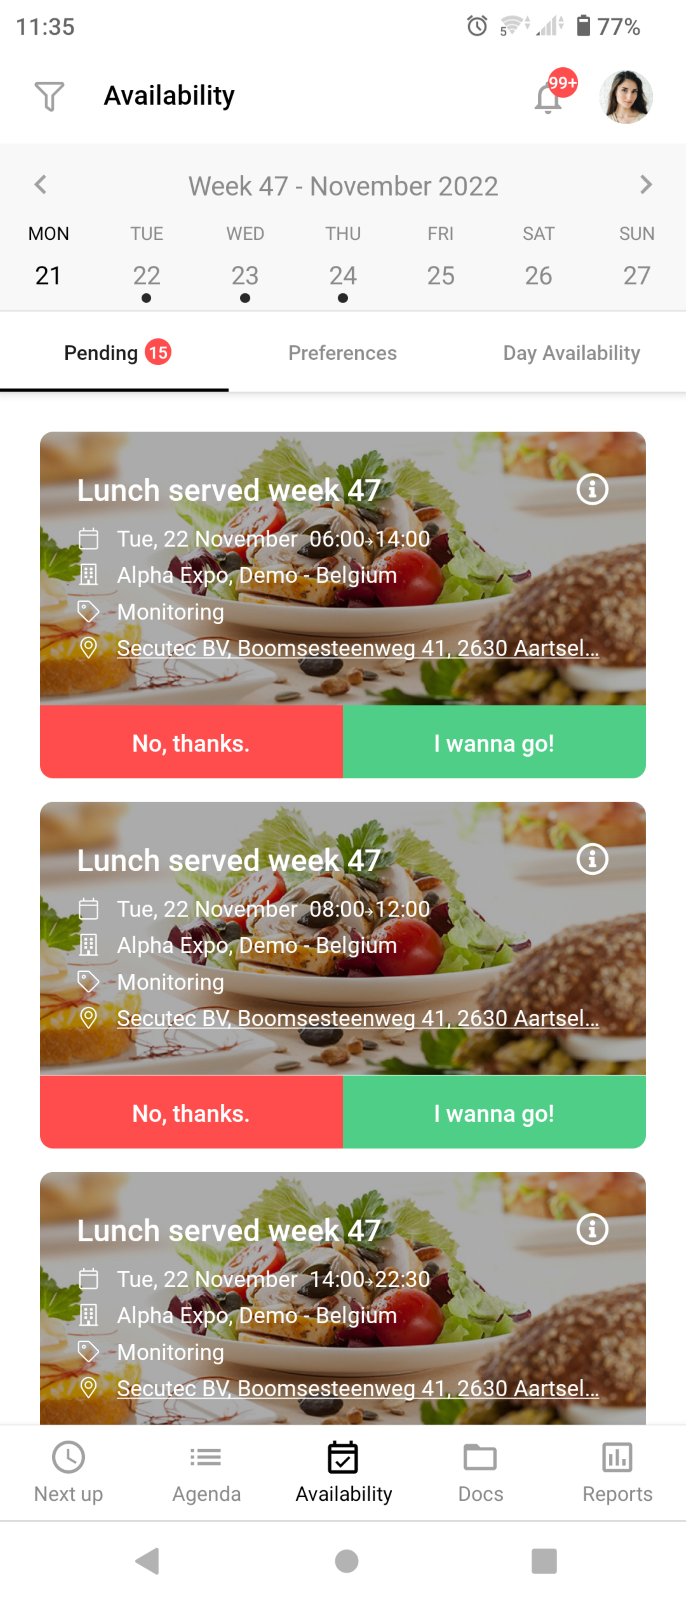
To make your project attractive to your employees or to already give them a taste of the type of project, you can add a cover image. You can upload a number of photos per company or one per project. These are then displayed with the project in the employee application.
The photo appears at the top of the project information in the app, as well as in the project card where employees enter their availability.
Add cover images to a company
When you consult the company file under COMPANIES in the menu bar, you will notice the MEDIA tab at the top.

Here you have the option to upload several photos, which then become standard for this company. When you next create a new project for this company, one of these photos will be chosen at random as the cover photo for this project. However, you still have the option to modify this photo for this project, as will be explained in subsequent sections.
To upload photos, find and select a file on your computer or simply drag and drop them into the box below.

CrewTip! The ideal size for a cover image is 1280x960 pixels. If your image is larger, only part of it will be visible to your employees in the app.
Once you add photos to the company sheet, however, only newly created projects will automatically get a cover photo in the app. So this does not apply to already existing projects, even if they take place in the future.
Add cover image to a project
If you wish to add an image to a particular project, select this project via DASHBOARD or AGENDA. This takes you to the project's details page, where you immediately have the option to add a cover image. Note that you can only assign one image to a project.
To do this, select the field on the far right, where you will see SELECT IMAGE.

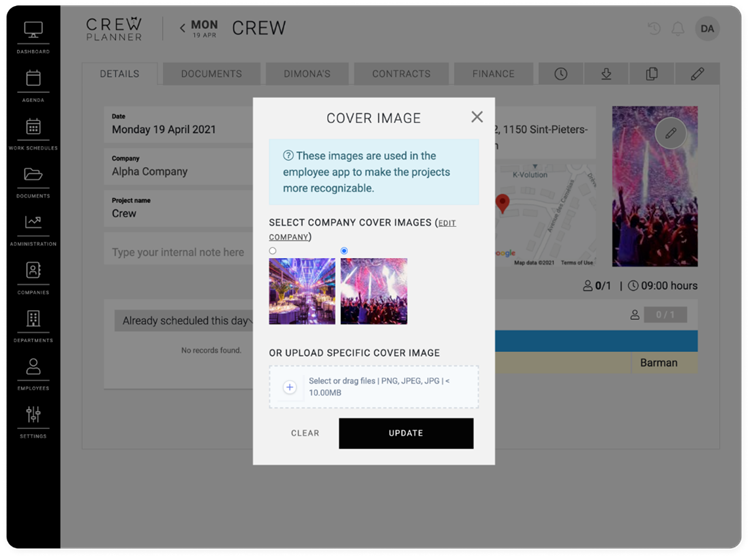
The pop-up below will then appear, allowing you to select or drag a file from your computer.

However, if you have already added photos to the company of this project, they will also be visible here and you can select from them.

Once you have uploaded and/or selected a photo, press UPDATE which will cause the image to appear in the project detail page and employee application.
Change cover image of a project
If you wish to change the already selected cover image for a project, simply select the image on the DETAILS tab:

As with adding an image, the pop-up appears where you can select another cover image from the company if available, or from your computer.

Once this is done, you press UPDATE again and the new cover image will be displayed in the project details page and employee application.
Remove cover image from a project
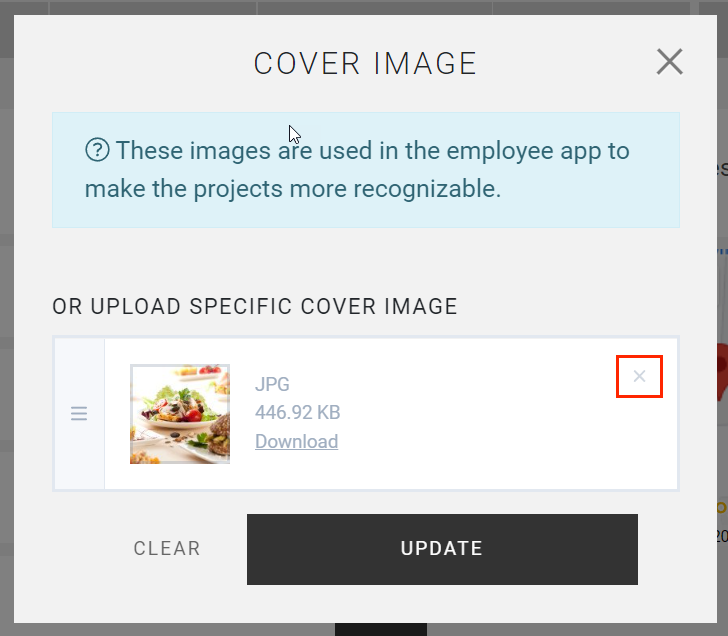
However, if you prefer to remove the cover image for a project, again select the image in the project detail page and you will see the familiar pop-up.
Company cover image
If you have selected a company cover image, you can remove this selection by selecting CLEAR at the bottom left and then UPDATE.
Cover image of the project
If you have uploaded a file from your computer, select the small cross at the top right corner of the image and then press UPDATE.
This will remove the cover photo of the project, both in the project detail page and the employee application.
We hope this article has helped you!
If you still have questions, take a look at our Crew Academy first. You might find the answer in one of our articles.