Dimona integration
How to correctly establish your Dimona linkage and connection to Social Security.
Table of contents
Introduction
The Dimona declaration is a time-consuming obligation for any employer with flexible labour. The Dimona module allows you to submit your Dimona declarations automatically and on time. If there is a difference between the hours worked and the Dimona declaration, an update is prepared for you to send. For this, however, the connection to the website of the Social Security Services must be established correctly.
In a moment, we will go through step by step the actions you need to take for this. More information on how the Dimona module works can be found in this article.
Enable dimona module
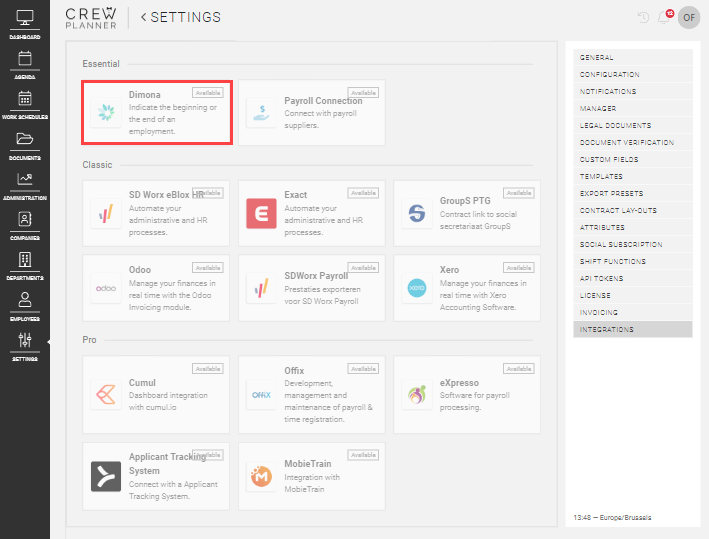
If you wish to use our Dimona module, navigate to SETTINGS and select INTEGRATIONS on the right-hand side. Here you have an overview of all possible integrations, as well as the Dimona integration.
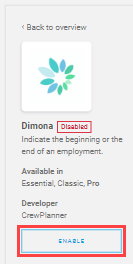
As soon as you select this, the Dimona integration page opens. Here you will see on the left-hand side under the logo ENABLE. As you can guess, select this to enable the module.
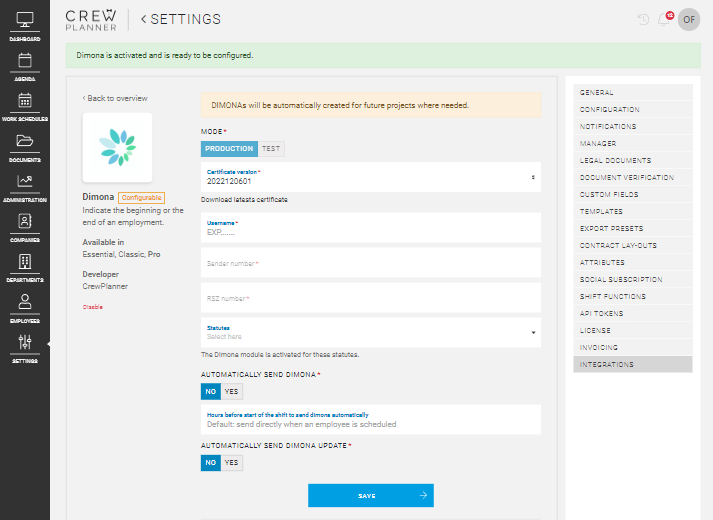
Once enabled, the Dimona settings are displayed where you will need to note down the necessary information. You will learn where to find this information in a moment.
Install certificate
Before we continue with completing the information, you first need to install your certificate.
1. Download certificate
To do this, start by downloading your most recent certificates through below:
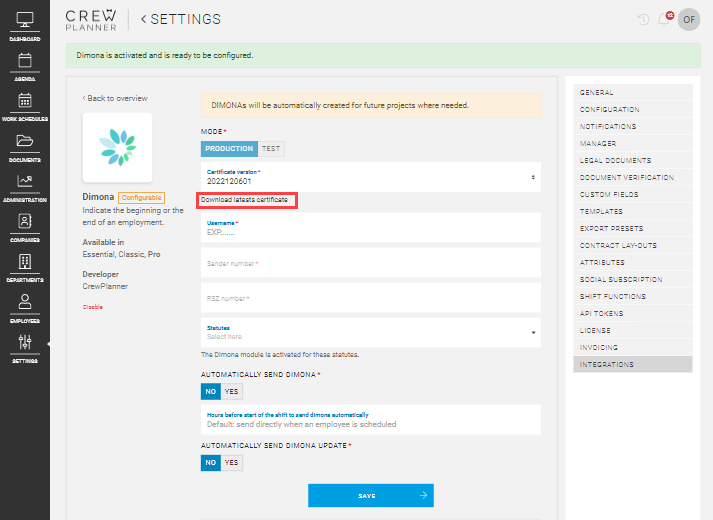
A ZIP file will be downloaded as a result and when you open it, 2 files will be displayed:

You will need these files to establish the link with Social Security and they should be uploaded on their website.
2. Upload certificate
As mentioned earlier, Social Security should always be in possession of the most recent certificate.
Here you have a short video followed by a description of the necessary steps:
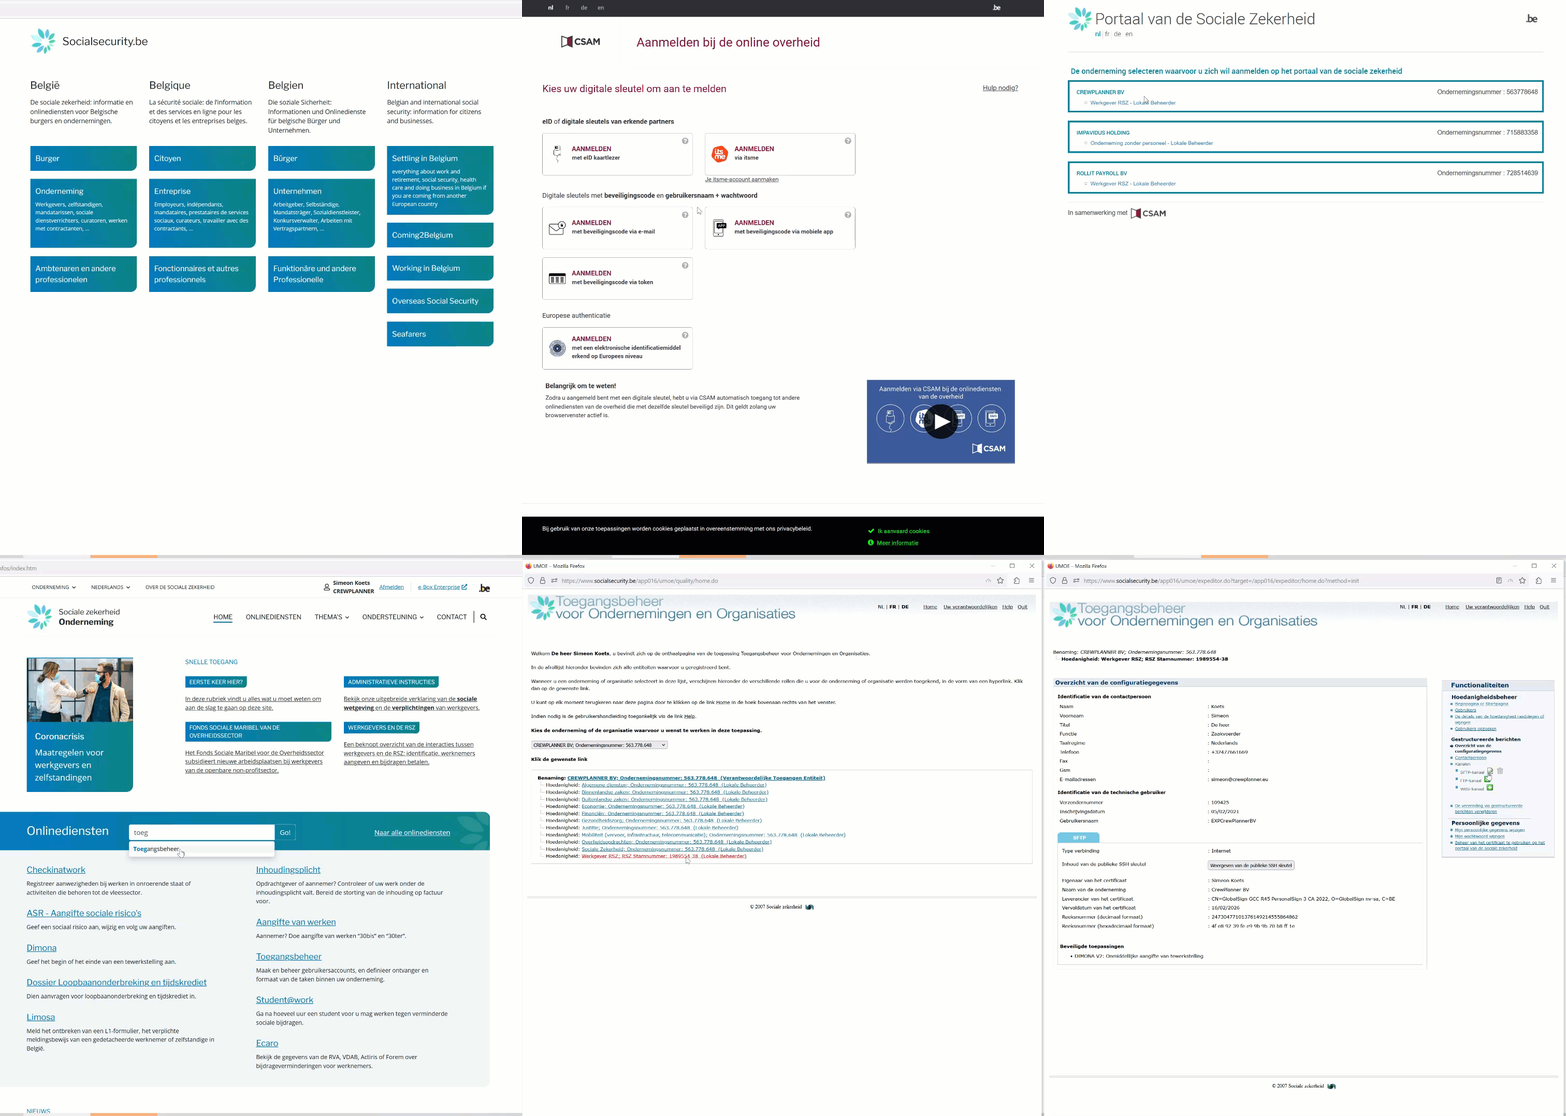
-
Go to the Social Security website via socialsecurity.be and select the Enterprise section.
-
Then select Login at the top which will give you several login options. Press the red Log in button again and choose one of these options. We prefer itsme authentication.
-
Once you have gone through the authentication process, the company you wish to sign up for will be displayed.
-
Select your company and you are logged in.
-
Go to the Access Management page. You can do this by using the search field in the middle of the page.
-
Select Access Management🔒 at the top right.
-
On the next page, again select the company or organisation for which you want to establish the link from the drop-down menu.
-
Then click on the capacity Employer RSZ.
-
In the Functionalities menu on the right, click two times on Structured messages.
-
Then click Save the configuration data.
-
Then Create a technical user.
-
Fill in the required fields.
-
Under Channels on the right-hand side, click on the green plus sign next to SFTP channel.
-
Here you upload the public SSH key, which is the file you downloaded earlier called public_ssh.ssh.
-
You also upload the certificate, the previously downloaded file called dimona.cert.
-
Next, you select Dimona V2, nothing else.
-
Finally, press save to get a summary of your configuration data and then select confirm to implement.
G
Your certificate has now been uploaded and made available to Social Security. You will need the information you find in the overview for your Dimona settings.
Dimona settings
Now you are ready to further complete your Dimona data and settings in CrewPlanner.
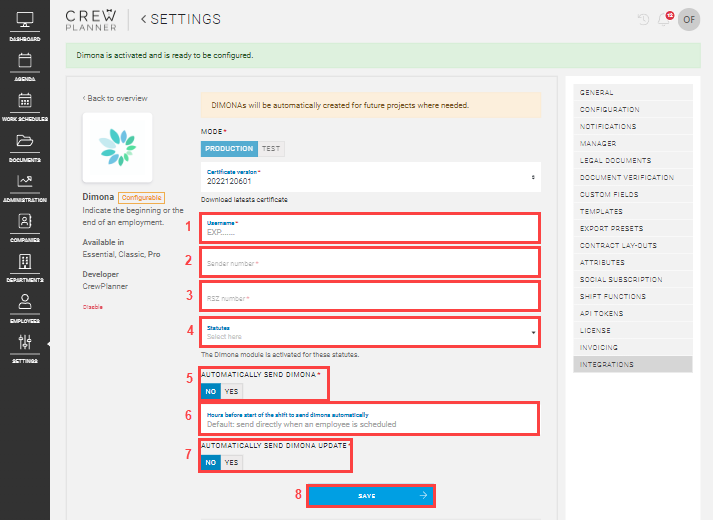
You will find the following information:
-
Username: This is the Username from the overview of your configuration data on the Social Security website. This always starts with EXP.
-
Sender Number: This is the Sender Number from the overview.
-
RSZ Number: Your RSZ Master Number displayed just above the overview.
-
Statutes: Do not make a selection if you wish to send Dimonas for all statutes. Or you can limit them by selecting some statutes.
-
Automatically send Dimona NO/YES: Select whether you want Dimonas to be sent automatically a defined number of hours before the start of a shift or you wish to do this manually.
-
Hours before start of the shift to send Dimona automatically: If you want Dimonas to be sent automatically, set the number of hours before the start of a shift here.
-
Automatically send Dimona update NO/ YES: Here you select whether you want to have a Dimona update sent automatically in case of a difference between the hours worked and the Dimona declaration.
CrewTip! If you set Dimona updates to be sent automatically, this will happen as soon as employees clock out or are clocked out by a supervisor.
Also do note that changing the starting hour when entering a time registration will always cause a late Dimona.
-
Save: select save to save this data and activate your Dimona module.
CrewTip! after activating the Dimona module, you need to grant this permission to the managers who are allowed to manage Dimona. Only then will the components of the Dimona module be visible to them. Read more about permissions here.
Now you are ready to use our module. However, we recommend that you always carry out a test to check that your link works properly.
CrewTip! The identification of a Dimona takes place when an employee is scheduled. As a result, Dimonas of employees who were scheduled before the activation of the Dimona module are not retroactively identified. You solve this by briefly unscheduling and rescheduling employees with a contract type for which a Dimona needs to be sent, after activation of the integration.
Renew certificate
A new certificate is needed every 2 or 3 years because the previous one expires. However, to give everyone a chance to replace the certificate, several certificate versions remain active at the same time for some time.
We recommend the following actions for renewing a certificate:
-
Go to your Dimona settings, which as previously mentioned, can be found under INTEGRATIONS in SETTINGS, and temporarily disable Automatically send Dimona and Automatically send Dimona update, if activated.
CrewTip! You must take into account the deadline you have set for automatically sending Dimona updates. This is because you will need to disable the automatic sending of Dimona's and updates early enough so that no Dimona is sent for projects that take place after you wish to renew the certificate!
This of course means that if Dimonas still need to be sent during this period, you will have to follow this up manually momentarily. More information on this can be found in this article.
-
Ensure that all past projects are finalised and that all Dimona updates have been processed.
-
Point out to your managers that they should not send Dimona's during the renewal, this will result in an error message.
-
Change the version of the certificate to the latest version via the drop-down at Certificate version.
-
Download the latest certificate as discussed earlier.
-
Update this certificate on the Social Security website. To do so, follow the steps below.
-
Do not perform any Dimona operations for an hour to make sure the certificate was processed.
-
Try manually sending a Dimona to check if it is proceeding correctly.
-
If this went well, you can re-enable automatic sending of Dimona and Dimona updates if desired.
Renewing the certificate on the Social Security website is done as follows:
-
Log on to socialsecurity.be. We prefer itsme authentication.
-
Go to the Access Management page. You can do this by using the search field in the middle of the page.
-
Again, select Access management🔒 at the top right.
-
On the next page, select the company or organisation for which you want to update the certificate from the drop-down menu.
-
Then click on the capacity Employer RSZ.
-
In the Functionalities menu on the right, click twice on Structured messages.
-
Under Channels in the menu on the right, click on the pencil next to SFTP channel.
CrewTip! please do not select the bin icon next to SFTP channel! This will delete this feature.
-
Here you upload the new public SSH key, which is the file you downloaded earlier called public_ssh.ssh.
-
You also upload the new certificate, i.e. the previously downloaded file called dimona.cert.
-
Select Dimona V2, nothing else.
-
Select save and confirm to exit and continue with the above steps.
We hope this article has helped you!
If you still have questions, take a look at our Crew Academy first. You might find the answer in one of our articles.