Contracts
Process and manage employee contracts efficiently.
Table of contents
Process contracts on a project basis
Contracts in the work schedule
Introduction
Before you are able to consult or process contracts, you will have to create templates and contract layouts. To learn more about how to do so, consult our respective articles. Also ensure you have the necessary permissions to view and process contracts.
As soon as your contract layouts have been created, you can process contracts on a project basis via the CONTRACTS tab of a project, or the CONTRACTS page under ADMINISTRATION offers you the option to process contracts in bulk for multiple projects at once.

Process contracts on a project basis
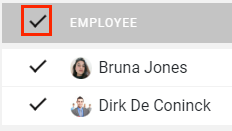
To process contracts within a specific project, navigate to the project's CONTRACTS tab. Once you tick one or more employees, the PROCESS button will appear, allowing you to process the contracts.

Once you select PROCESS, a contract is created. Depending on your contract layout settings, this also sends the contract to the employee for signature:

What information you see here and what possible statuses are possible, we will discuss in the chapter contract information.
CrewTip! Tick the selection box at the top of the grey bar to select all employees and process all contracts at once.
Process contracts in bulk
Navigate to the CONTRACTS page under ADMINISTRATION for additional options to process, send, and consult contracts in bulk. Use the search function and filters at the top to quickly find contracts.
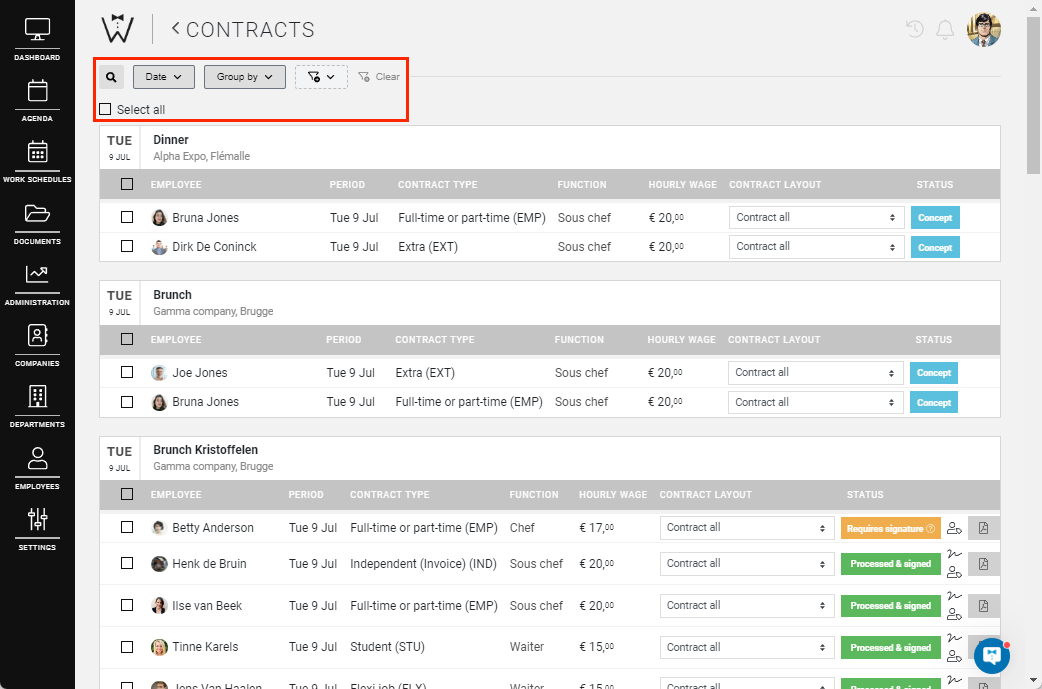
Options available to you:

-
Search function:
Use the magnifying glass icon to open the search box and locate projects with the information you need.
-
Filters:
Access various filters by selecting the funnel icon. With the CLEAR option you have the option to clear all other applied filters at once, but the date and group by filters are always active.
What filters do you have available:
Select the funnel icon to display the filter menu. As on the other pages, the filters have been divided by the subject they relate to, being project, employee, contract and view.
-
Date: you can choose which period you wish to consult. If you open this filter you will be presented with a list of options here, or you can manually choose a period by simply selecting the start and end date.
-
Departments: this filter allows you to select one or more departments, if required.
-
Department groups: this filter allows you to select one or more department groups, if required.
-
Companies: this lets you quickly display the contracts for your employees scheduled on projects of specific customers.
-
Employees: here you can select one or more employees for whom you want to see the contracts. This also allows you to monitor at employee level whether all contracts are sent and processed properly.
-
Employee type: it is also possible to filter your contracts by employee type.
-
User type: using this filter, you can quickly distinguish between supervisors and regular employees.
-
Statuses: this filter allows you to display only those employees with a certain status, such as, for example, those employees for whom documents have not yet been checked.
-
Contract statuses: the filter by contract status is also very handy. It allows you to quickly check which contracts still require a signature, for example.
-
Group by: finally, you can change the view on this page by grouping by project or employee.
-
-
Select all
Tick Select all to select all contracts on the page. Note that even if a contract has already been sent, it will be regenerated, prompting the employee to sign it again.
If you then select PROCESS, all the contracts on this page will be sent to the employee concerned.
CrewTip! If you have many projects for which you have to send contracts, you will see at the bottom that there are several pages with contracts, as you can see in this example:
If you then select Select all and then PROCESS, all contract on the first page will be processed, but not those on the other pages. This prevents you from unintentionally sending too many contracts.
Select all
Tick Select all to select all contracts on the page. Note that even if a contract has already been sent, it will be regenerated, prompting the employee to sign it again.
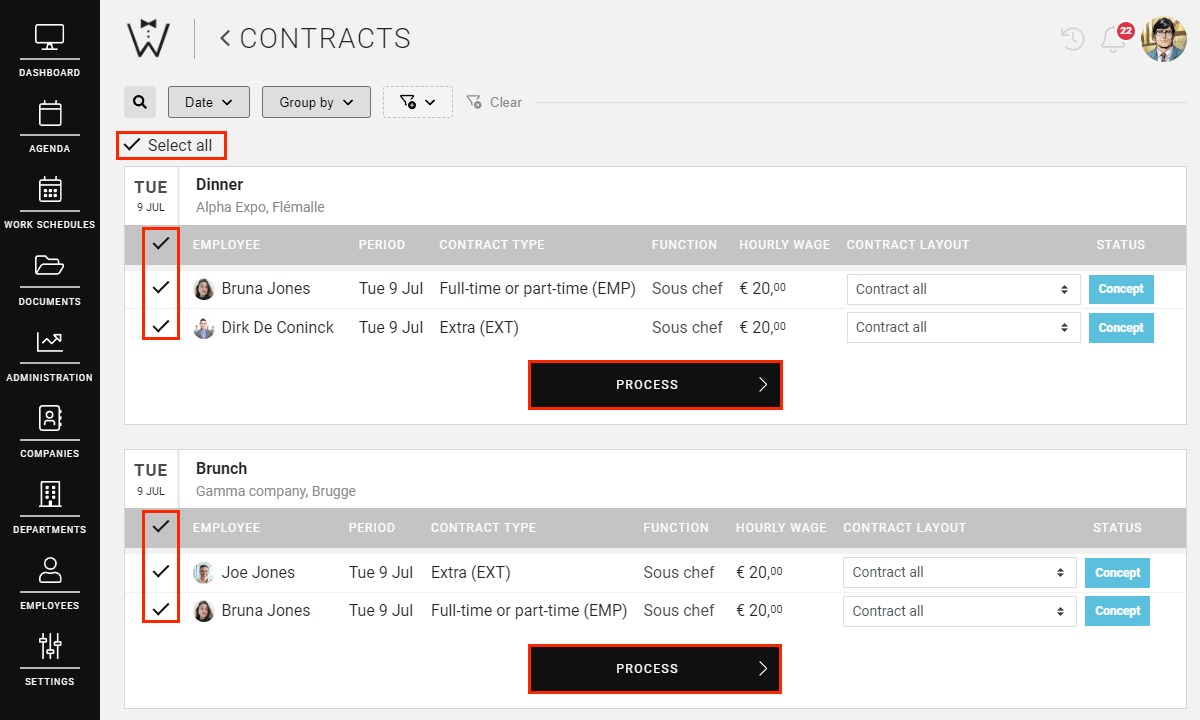
If you then select PROCESS, all the contracts on this page will be sent to the employee concerned.
CrewTip! If you have many projects for which you have to send contracts, you will see at the bottom that there are several pages with contracts, as you can see in this example:
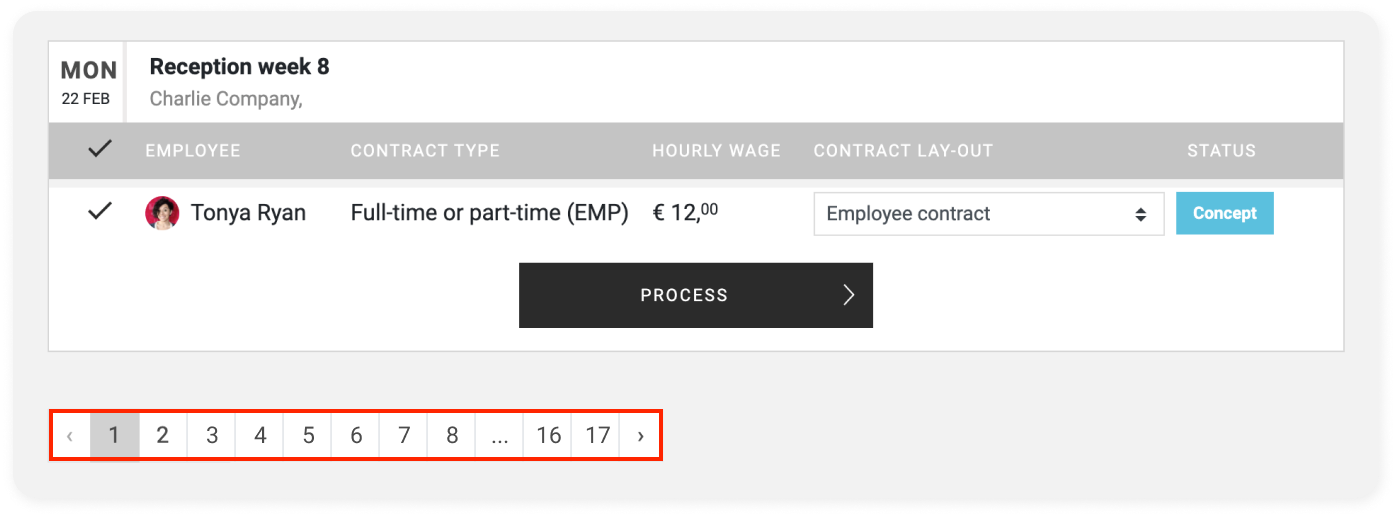
If you then select Select all and then PROCESS, all contract on the first page will be processed, but not those on the other pages. This prevents you from unintentionally sending too many contracts.
IMPORTANT: Contracts are NOT sent automatically unless you have a link to our service partner Offix.
If you have a link with Offix, the contract will be sent as soon as the Dimona has been accepted or, if you do not use our Dimona link, 24 hours before the start of the shift. In this case, if you schedule an employee on a shift that starts within 24 hours, the contract is automatically processed within 15 minutes.
Contract information
As indicated earlier, you can consult contracts either via the project itself or via ADMINISTRATION.
Consulting these contracts is the same for both, however the information displayed depends on a possible integration with a partner:

-
Check boxes: You can select the to be sent contracts per employee using the box next to their name or you can choose to select all by using the box in the gray bar.
-
Employee: Names of the employees.
-
Period: Date of the project or the period of this contract.
-
Reference: Shift reference if this functionality is being used.
-
Contract type of the employee.
-
Function of the employee.
-
Hourly wage: The hourly wage is explicitly stated so that you do not need to consult the contract for this information. The hourly wage is determined on the basis of how you have the wage rules set up.
-
Contract lay-out: Here you will find the contracts for which the employee is eligible. The filters that you have set in the contract lay-out are taken into account here. Here you have the option to select the contract to be generated for the employee.
-
Status: Based on the status, you can see in which phase the processing of a contract is, more on this in a moment.
-
Additional information: Place your cursor on the signature for more information about when the employee signed the contract, the person icon shows by whom and when the contract was sent.
-
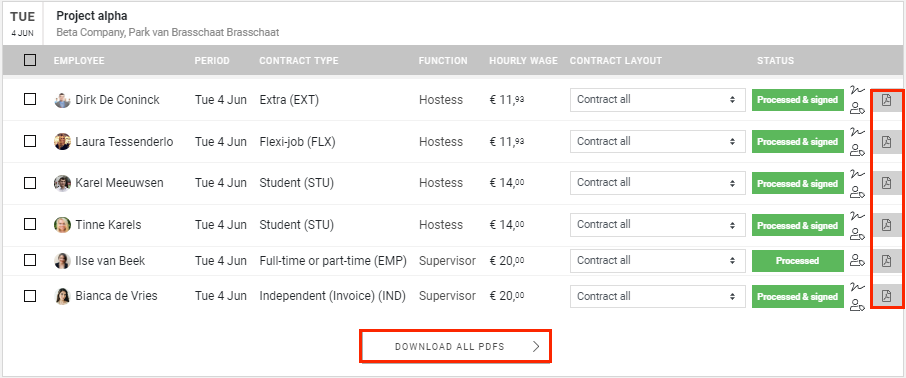
PDF icon: Select and download a PDF file of the contract.
Check boxes: You can select the to be sent contracts per employee using the box next to their name or you can choose to select all by using the box in the gray bar.
Employee: Names of the employees.
Period: Date of the project or the period of this contract.
Reference: Shift reference if this functionality is being used.
Contract type of the employee.
Function of the employee.
Hourly wage: The hourly wage is explicitly stated so that you do not need to consult the contract for this information. The hourly wage is determined on the basis of how you have the wage rules set up.
Contract lay-out: Here you will find the contracts for which the employee is eligible. The filters that you have set in the contract lay-out are taken into account here. Here you have the option to select the contract to be generated for the employee.
Status: Based on the status, you can see in which phase the processing of a contract is, more on this in a moment.
Additional information: Place your cursor on the signature for more information about when the employee signed the contract, the person icon shows by whom and when the contract was sent.
PDF icon: Select and download a PDF file of the contract.
Contract status
A contract ready to be processed has the status:

Once you select one or more employees, you are able to process contracts. Once you have processed a contract, 2 scenarios are possible.
Either no signature is required and you will receive the status Processed:

Or a signature is required and you will receive the message Requires signature:

Once the employee has signed this contract, what they must do be able to continue in the CrewPlanner app, you will see the status Processed & signed:

If you remove an employee from a shift, after the contract has been processed (and signed), the status will read Cancelled.

When your employee's contract has been processed (signed or not), but ultimately does not appear for the shift. Register this as a No show in time registration.

You will only receive the status Error if you have an integration with one of our partners for processing your contracts or if you work with a payroll supplier. You will also receive a message indicating the cause of the error or that you should contact your partner.
Download contracts
You have the option to download the PDF files of the signed contracts through the pdf-icon on the right side of a contract or through DOWNLOAD ALL PDFS on the bottom of the list of signed contracts.
Contracts in the work schedule
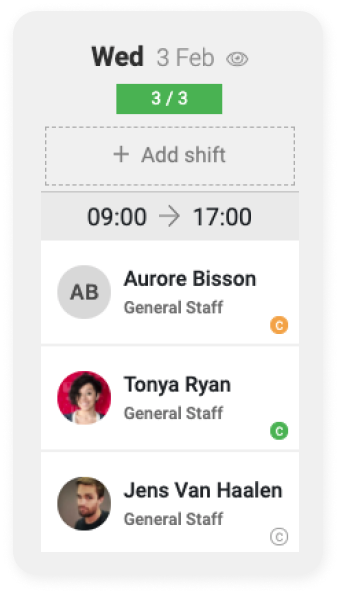
When you use work schedules for your planning, you can see at a glance which contracts have been processed (and signed) and which contracts still require attention.
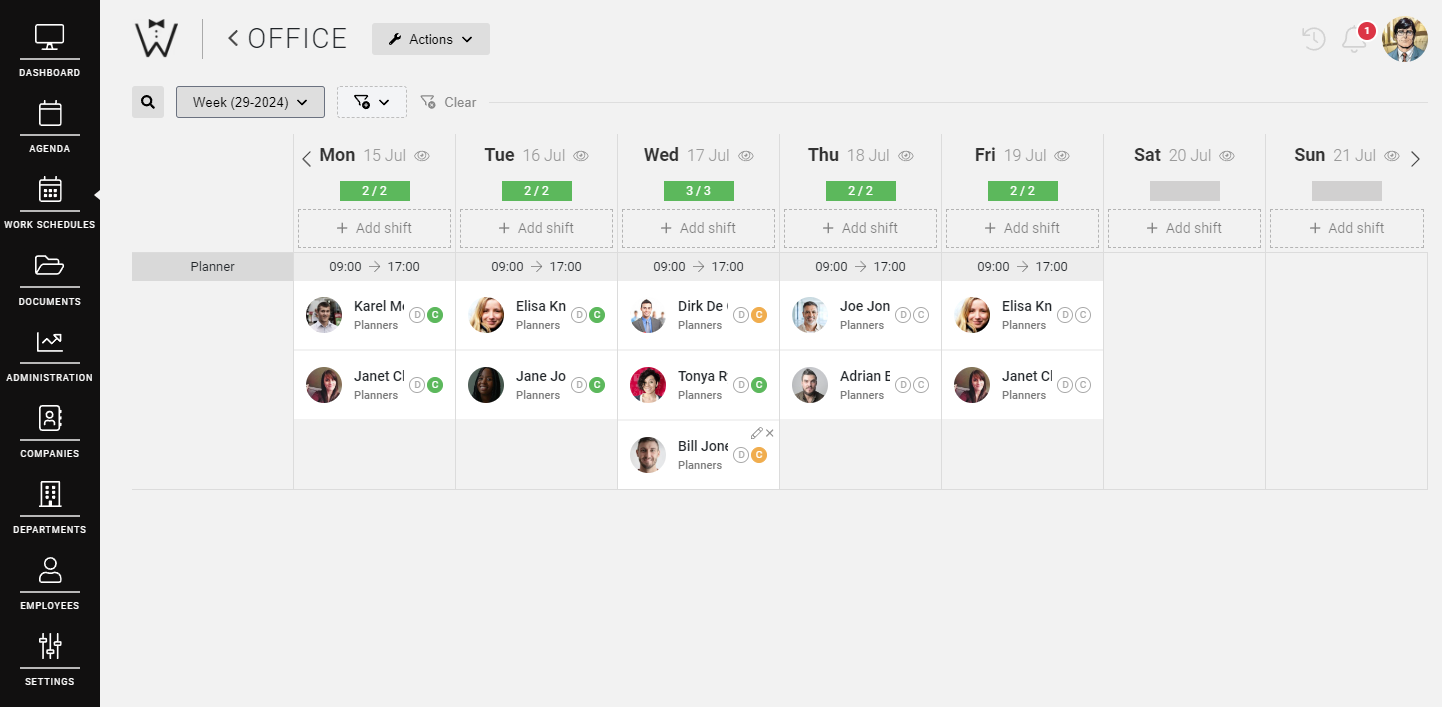
Here you can recognize the three statuses as follows through the circle to the right of the name, containing the letter 'C' and the following colour codes:
-
Green: the contract has been processed and signed when needed.
-
Orange: the contract has yet to be signed by the employee.
-
Blank: the contract is ready as Concept and you still need to process it.
CrewTip! If you would like to consult the day's contracts on a work schedule. Select the eye icon next to the date and the tab CONTRACTS.

Contract example template
Download a contract example template by selecting below:
We hope this article has helped you!
If you still have questions, take a look at our Crew Academy first. You might find the answer in one of our articles.
