Use our integration with Exact Online to automatically generate invoices.
Table of contents
Integrating your Exact Online account with your CrewPlanner account
Configure the Exact Online integration
Connect your companies in the company file
Connect your articles from Exact Online with CrewPlanner
Connect ledger accounts with CrewPlanner
Set invoice layout per department group
Introduction
If you use Exact Online to process your invoicing, you have the option to integrate CrewPlanner with Exact Online to invoice the hours worked from CrewPlanner to your clients.
You can use our invoicing module by activating it at CONFIGURATIONS in SETTINGS.
When you have activated the invoicing module, follow this article to integrate with Exact Online and set up your general settings.
For more information on setting up invoicing rules in CrewPlanner and creating invoices or credit notes, see the article on the invoicing module.
Integrating your Exact Online account with your CrewPlanner account
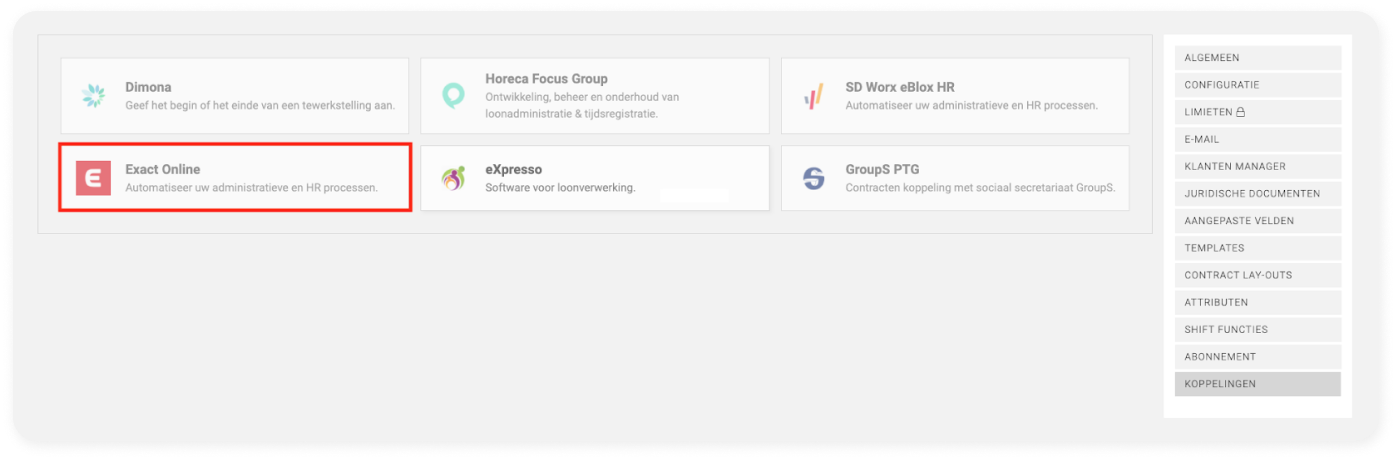
As soon as you have activated the invoicing module, navigate via SETTINGS on the right to INTEGRATIONS. Here you will find the Exact Online integration.
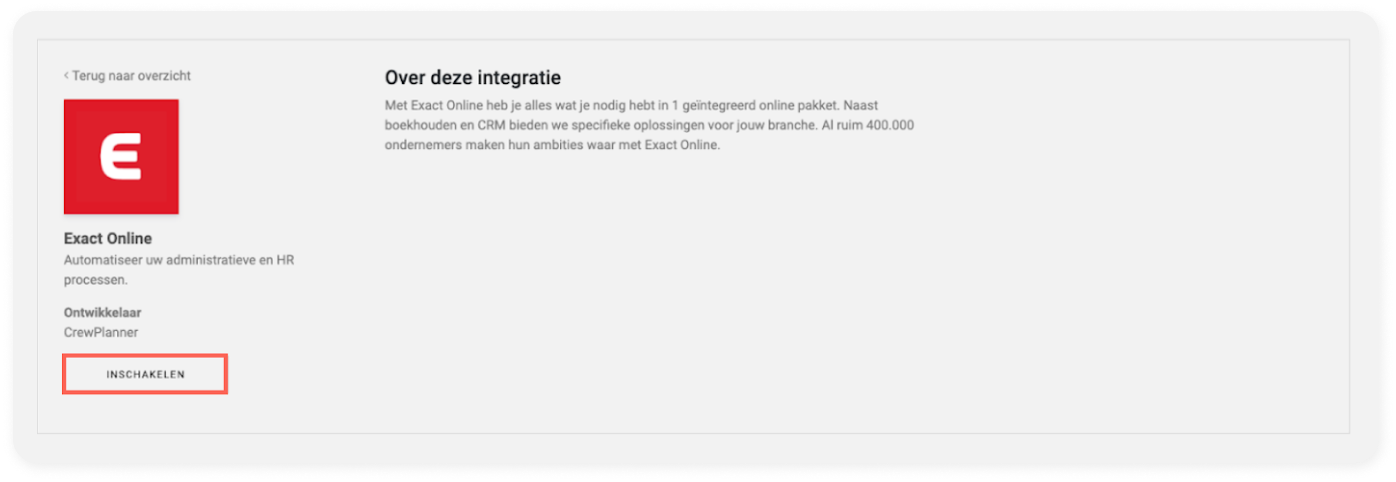
Once selected, you will be taken to the next page. Here you will see ENABLE underneath the Exact Online logo, to activate the integration.
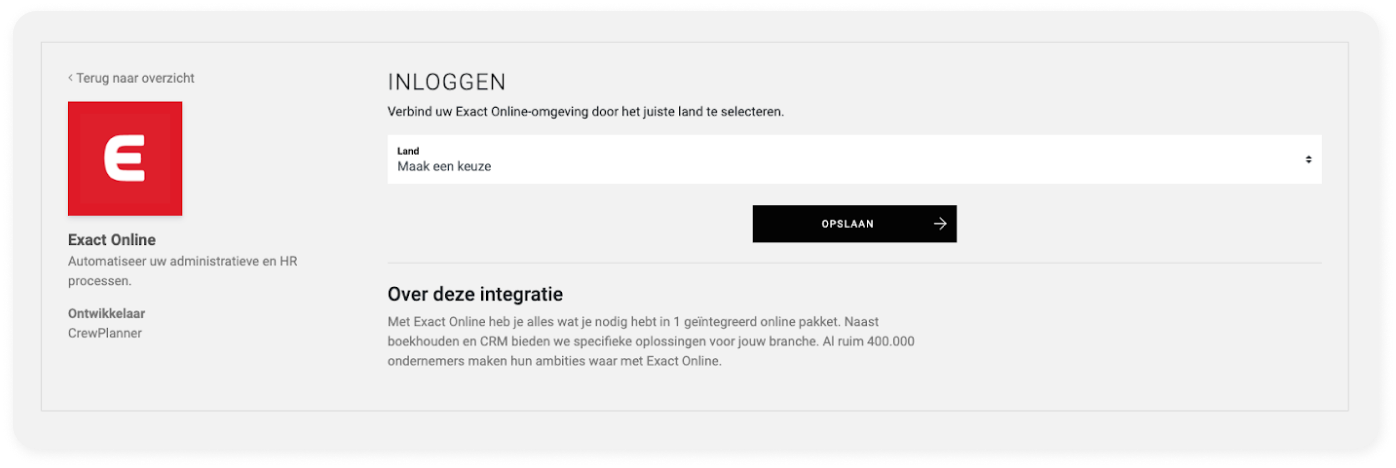
Next, you will be asked to select your country. After this, press SAVE.
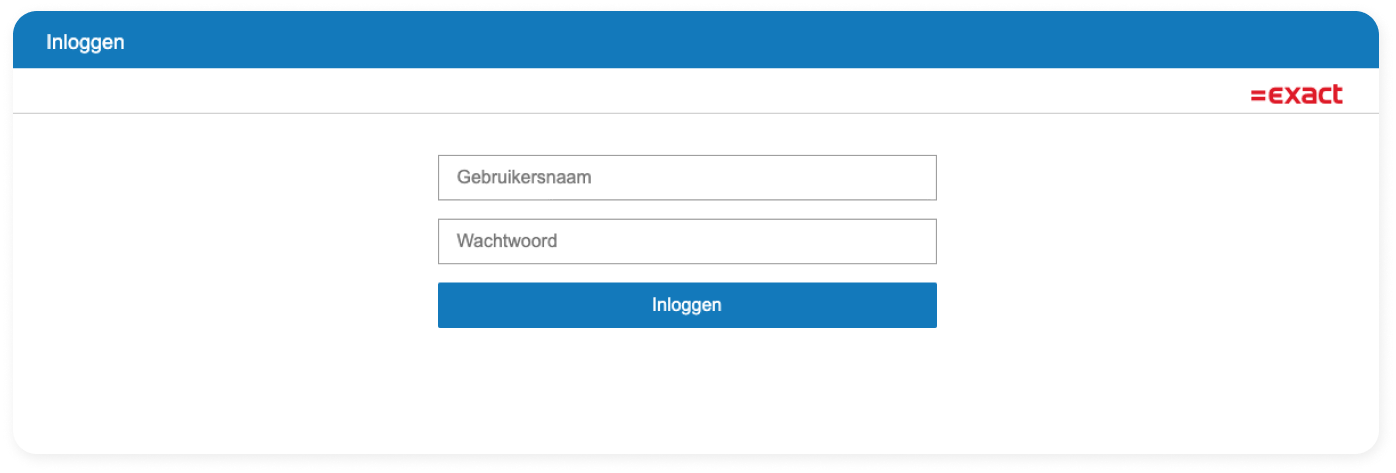
This will take you to Exact Online's login page, where you log in with your login details.
Once you have logged in, CrewPlanner loads and you will be directed back to the INTEGRATIONS page in CrewPlanner. In the next chapter, we will explain how to get started with the configuration.
Configure the Exact Online integration
Once the link is active, you can set a number of things here on the INTEGRATIONS page, including:
-
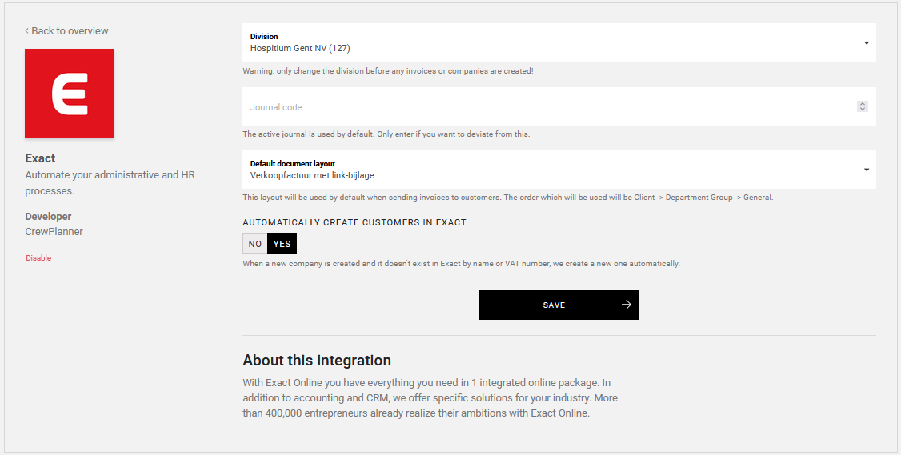
Division: if you use different companies in Exact Online, here you need to choose which company the link should be made with.
-
Journal code: by default, the active journal is used. You only fill this in if you want to deviate from this.
-
Default document layout: here you set a default layout for the invoices. You choose from one of your own template invoices, which CrewPlanner loads from Exact Online.
-
Below these fields you will see AUTOMATICALLY CREATE CUSTOMERS IN EXACT with YES/NO underneath. As you can guess, this allows you to automatically create customers in Exact Online when a new customer is created in CrewPlanner.
Division: if you use different companies in Exact Online, here you need to choose which company the link should be made with.
Journal code: by default, the active journal is used. You only fill this in if you want to deviate from this.
Default document layout: here you set a default layout for the invoices. You choose from one of your own template invoices, which CrewPlanner loads from Exact Online.
Below these fields you will see AUTOMATICALLY CREATE CUSTOMERS IN EXACT with YES/NO underneath. As you can guess, this allows you to automatically create customers in Exact Online when a new customer is created in CrewPlanner.
Finally, save these settings by selecting SAVE.
Connect your companies in the company file
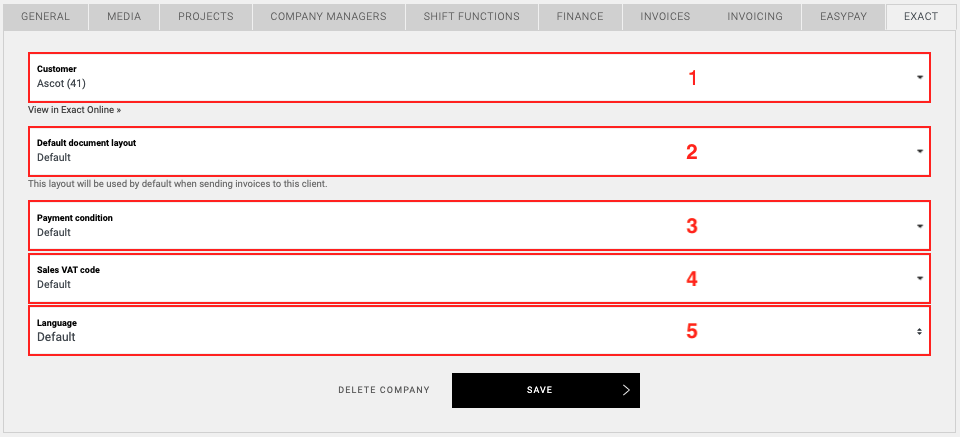
In your company files, you now have the additional EXACT tab, where you can set a number of things for the company.
-
Customer: Here CrewPlanner will automatically link the company with this same company in Exact Online using the VAT number. This will happen automatically, but you can also perform this manually by selecting the desired company and then SAVE. As you can see above, a number will appear behind the customer name, referring to the customer number in Exact Online.
-
Default document layout: If required, you could select a different layout for the invoice for the company. The list of options you have here is loaded from Exact Online.
-
If you wish, you can also set payment conditions for the company. The options you see here are once again loaded from Exact Online.
-
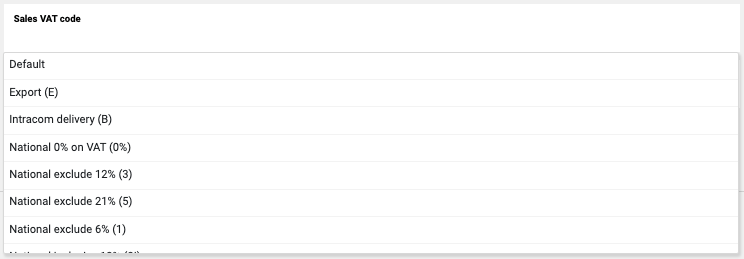
Sales VAT code: The VAT to be applied for sales on the invoices.
-
Here you can select a different language if necessary if it differs from the default.
Customer: Here CrewPlanner will automatically link the company with this same company in Exact Online using the VAT number. This will happen automatically, but you can also perform this manually by selecting the desired company and then SAVE. As you can see above, a number will appear behind the customer name, referring to the customer number in Exact Online.
Default document layout: If required, you could select a different layout for the invoice for the company. The list of options you have here is loaded from Exact Online.
If you wish, you can also set payment conditions for the company. The options you see here are once again loaded from Exact Online.
Sales VAT code: The VAT to be applied for sales on the invoices.
Here you can select a different language if necessary if it differs from the default.
CrewTip! In addition to synchronising the companies between CrewPlanner and Exact Online using the VAT number, a second synchronisation takes place based on the customer number from Exact Online. Here, the information entered in Exact Online will be transferred to CrewPlanner for the following fields from the tab above: Payment condition, Sales VAT code, Language. The Default document layout for your invoices must be selected in CrewPlanner.
Connect your articles from Exact Online with CrewPlanner
In order to set up the remaining invoicing rules as accurately as possible, we move on to connecting your articles. It is important that you set this basis properly from Exact Online to make optimal use of it in CrewPlanner. Here, we'll also briefly discuss which actions you need to take in Exact Online.
However, if you are not quite comfortable with setting up your items in Exact Online, we recommend involving your accountant.
CrewTip! you can also take advantage of our extra paid service, if necessary, where our Exact Online expert will set this up for you completely in consultation with your accountant.
From the INVOICING page you now have at SETTINGS, select the last tab ARTICLES.

The articles you wish to use from Exact Online can be divided into 4 types by adding a key piece of text to the Code field within the item under the section products and services in Exact Online. These types are Work Hour, Transport, Miscellaneous and Calculable rule.
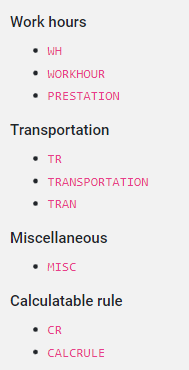
Each type has its own names that you can add to the code. You then place the pink text in front of the code name in Xero followed by a “-” and then your name.
Here are a few examples:
WH-clerk
TR-car
MISC-rent walkie-talkie
Set articles in Exact Online:
In Exact Online you have mandatory General fields when creating or adjusting your articles, Code and Description, which you must complete.
The rest is optional and depends on how you like to keep an overview in your accounting. As the items relate to hours and/or kilometres to be invoiced, the Divisible and Sales fields under properties are also applicable.
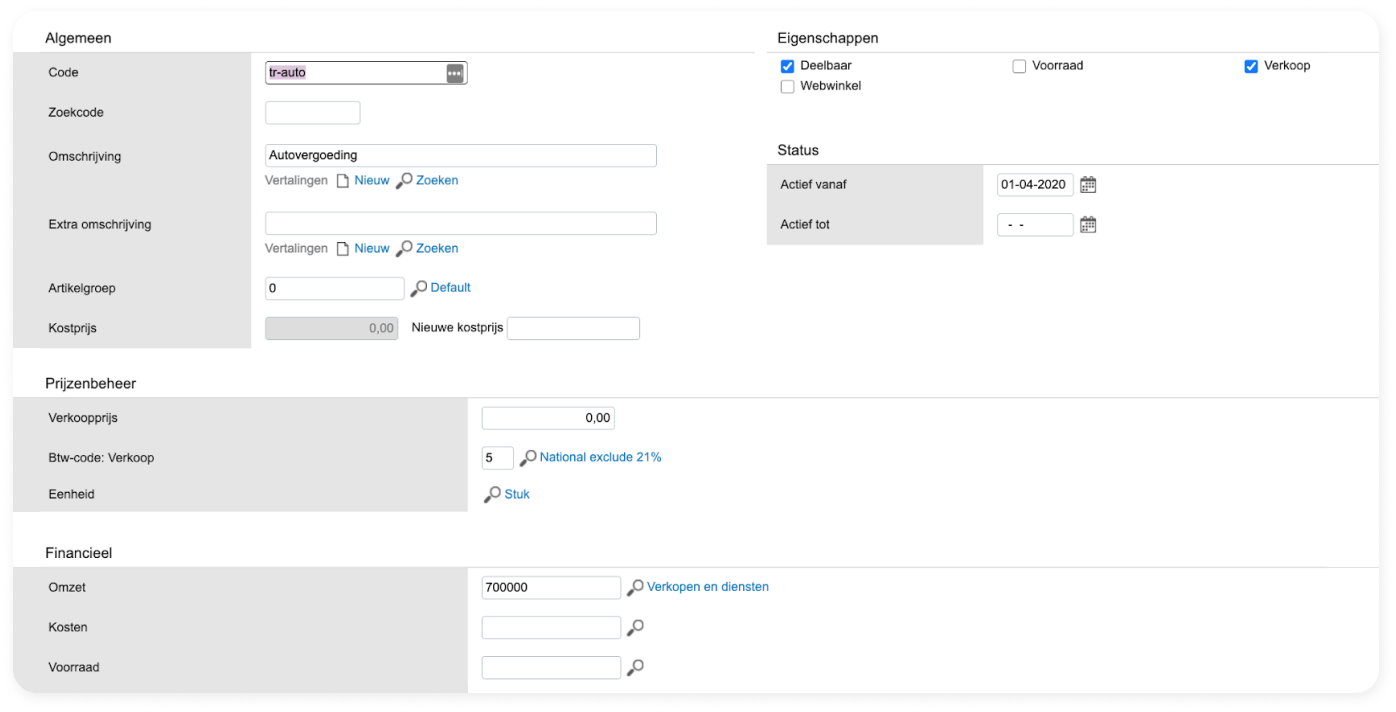
The sales price is always entered by CrewPlanner from the shift function settings and should be left EMPTY in Xero. The only exception to this is for travel costs where you enter a price in the Xero article. What we recommend is to enter a VAT code and set up the general ledger account.
Please note that the description or name of the article is visible to the customer on the invoice.
You have the flexibility to make this as comprehensive as you wish. It all depends on how you want to see this information reflected in your accounting analytics.
After you have set everything up, you must synchronize CrewPlanner to Xero. By default, this happens once every 24 hours as standard. But you can also SYNC MANUALLY, this can be found at the top of CrewPlanner's ARTICLES page.
Connect ledger accounts with CrewPlanner
Finally, you have the option to connect your ledger accounts to your working hours and travel expenses by department, if you use this in CrewPlanner.
To set this up, navigate through SETTINGS to INVOICING, there you will find the tab LEDGER ACCOUNTS.
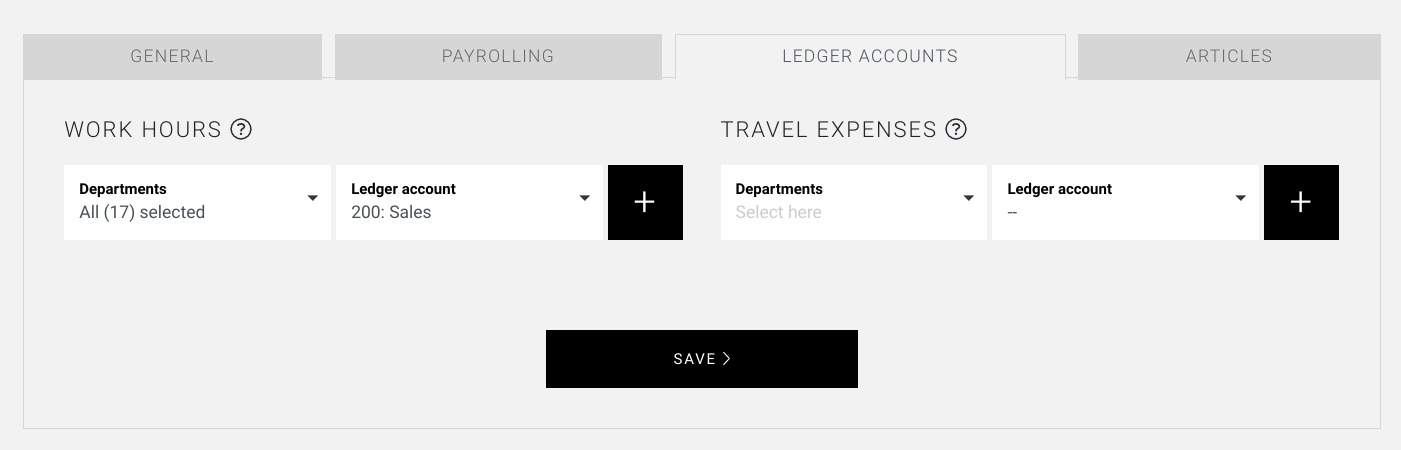
If you wish, you can set the ledger accounts per department for the work hours or travel expenses for your accounting analytics. As an example, this provides you with an overview of the turnover per department. If you have linked a ledger account to one particular department, the invoiced hours will be found with the ledger accounts set up in Exact Online.
All the necessary links between CrewPlanner and Exact Online have now been made and you are ready to set up your Invoicing Rules. You can find out how to do this using the article on our invoicing module, where we take you step-by-step through the various options. Here you will also find more information on how to create your invoices and credit notes.
Set invoice layout per department group
When you use Exact Online, you have the additional option of linking an invoice layout to a department group.
To do this, select the pencil icon of the department group in DEPARTMENTS from the menu bar. You will notice that you now have an extra tab EXACT here.

Using the dropdown menu, select the invoice layout you want to set up for this department group, which will be loaded from Exact Online and finish with SAVE.
If you make no changes, the default layout will be used.
CrewTip! Note, however, that in order to correctly add all the information from CrewPlanner to your invoices in Exact Online, the following three fields need to be present in your invoice layout: payment reference, description and your reference. If these are not visible in Exact Online, add them as follows:
-
In Exact Online, select this icon in the top right corner and add the fields:
-
When you know which fields you need in your layout, go to Basic data > Overview | Document templates > Document template for | Sales invoice
-
Then in the layout editor, add a field and for Block, select Invoice and for Sub Block, select Header, and add the required fields.
In Exact Online, select this icon in the top right corner and add the fields:

When you know which fields you need in your layout, go to Basic data > Overview | Document templates > Document template for | Sales invoice
Then in the layout editor, add a field and for Block, select Invoice and for Sub Block, select Header, and add the required fields.

We hope this article has helped you!
If you still have questions, take a look at our Crew Academy first. You might find the answer in one of our articles.