The processing and approval of the hours worked by employees on projects as external Manager.
Table of contents
Where to find time registration
Clocking in and out of employees
Submitting time registration review
Introduction
To check the hours worked by the employees, to modify or to assess performance and to submit them so that they can be exported, you use the time registration.
Where to find time registration
On your dashboard you have a module called TIME REGISTRATION, which displays the last eight completed projects for which the timesheets can be completed by a manager.

If you select one of these projects, you will be taken to the time registration page of that project.
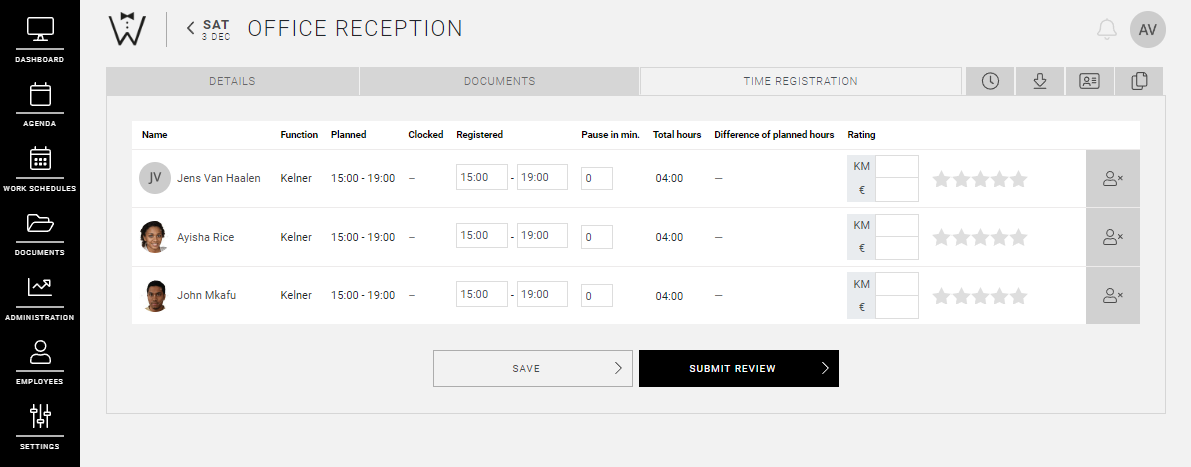
For every project which has an active timer, the tab TIME REGISTRATION appears, in which the time registrations of that project are displayed. The timer only becomes active one hour before the start of the first shift.
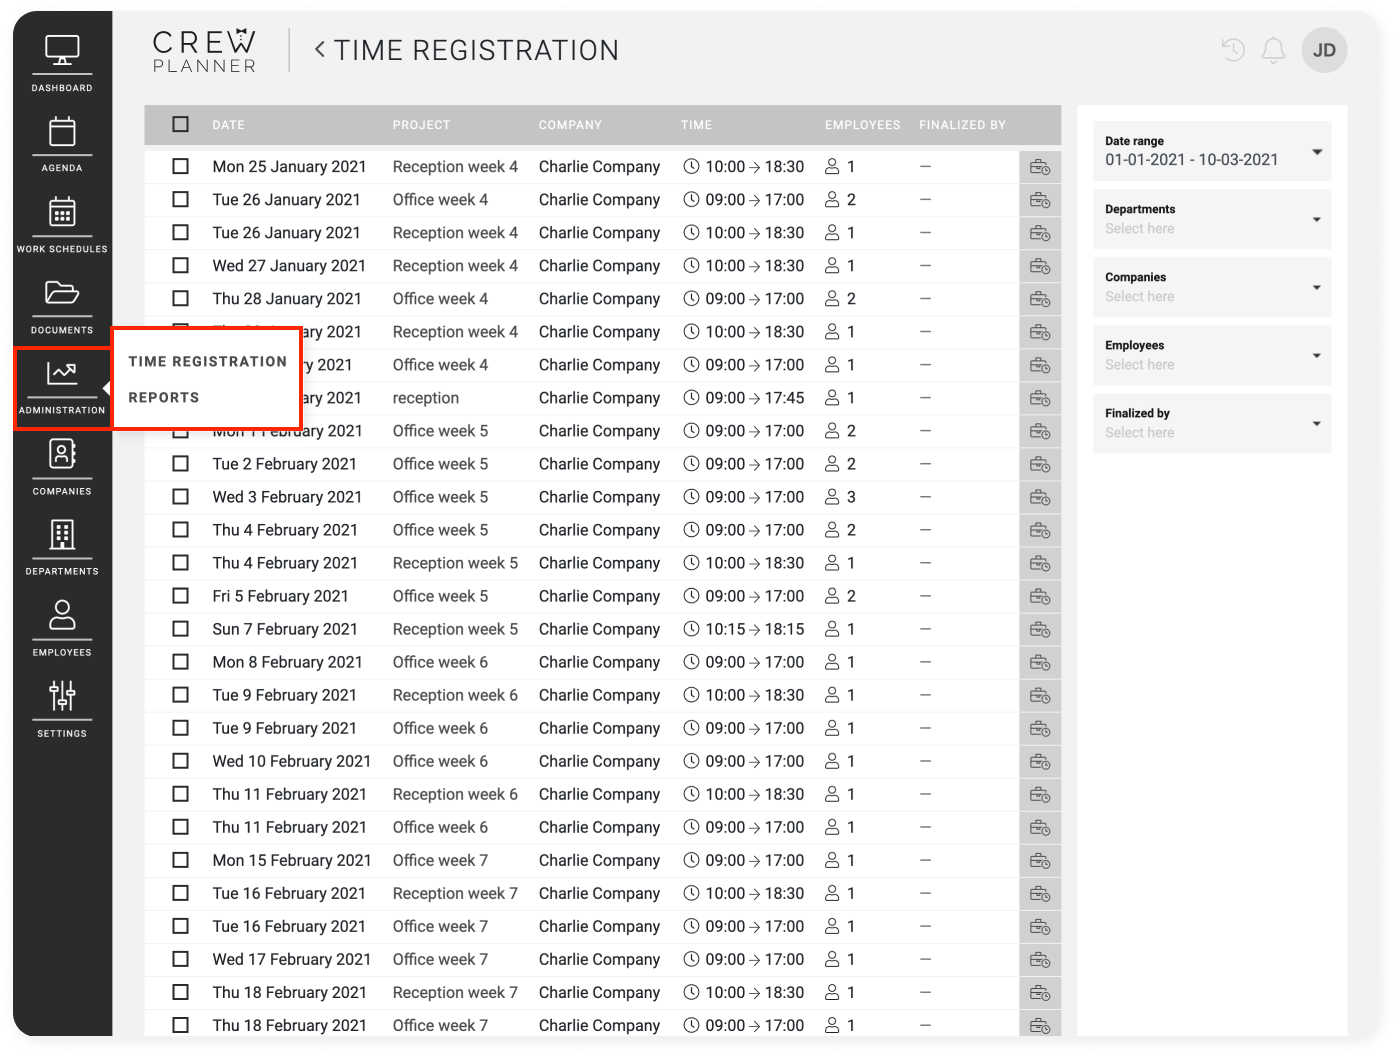
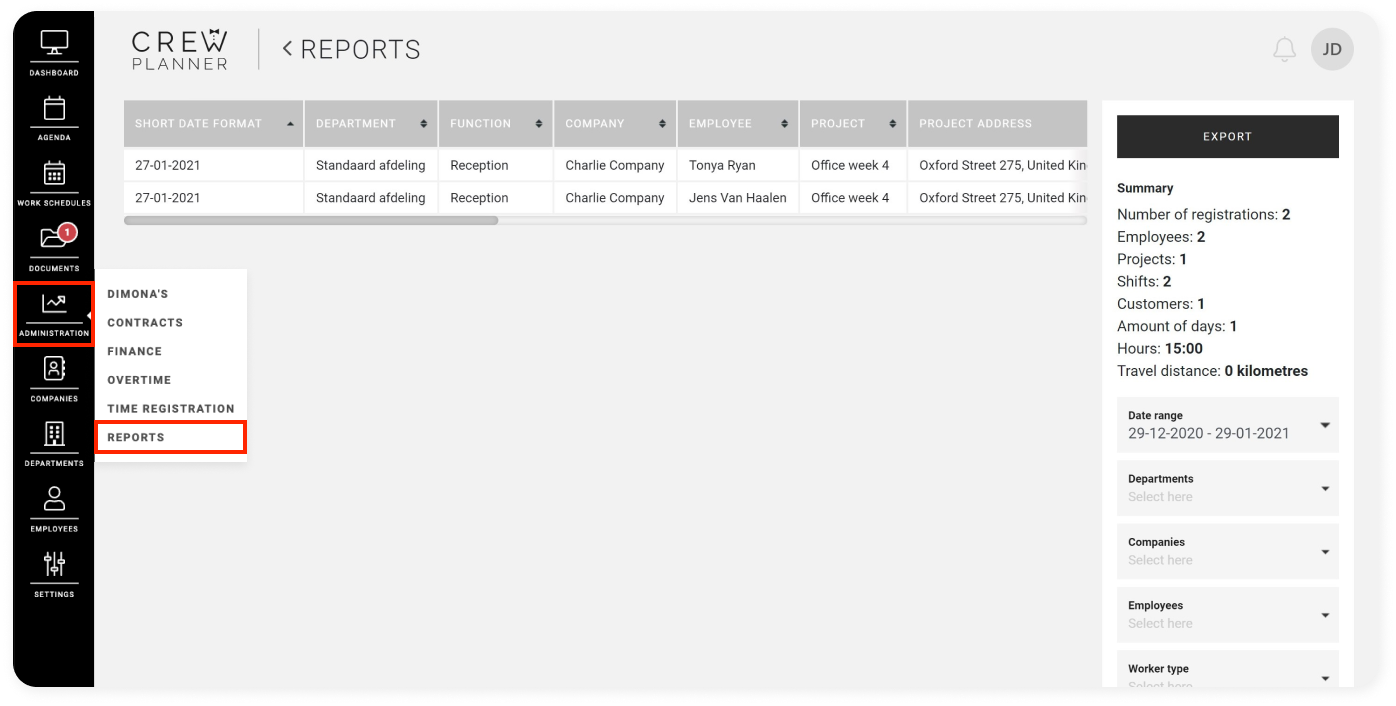
You also have the option to consult the general TIME REGISTRATION page via ADMINISTRATION. Here you can process the timesheets in bulk. You can read how to navigate in this page here.
Consult time registration
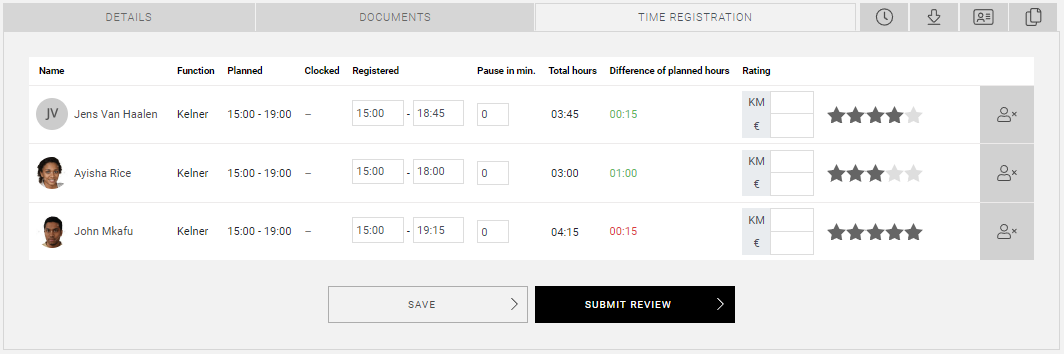
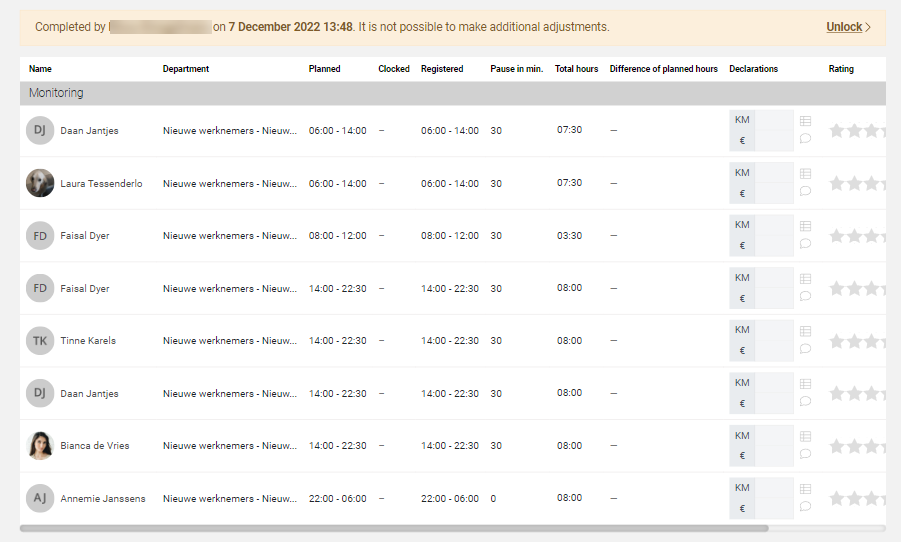
On the time registration page you will find a list of the scheduled employees with fields that relate to the employee's performance.
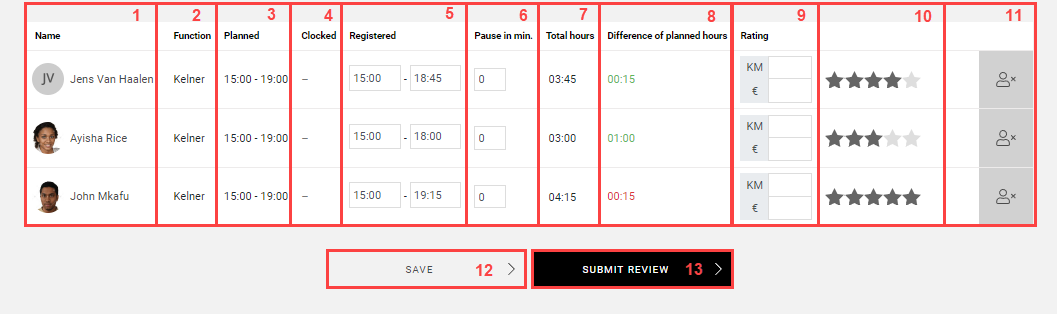
1. Name: here you find the name of the employee.
2. Function or Department: the function or department of the shift, depending on your selection in the Group by filter on the agenda page.
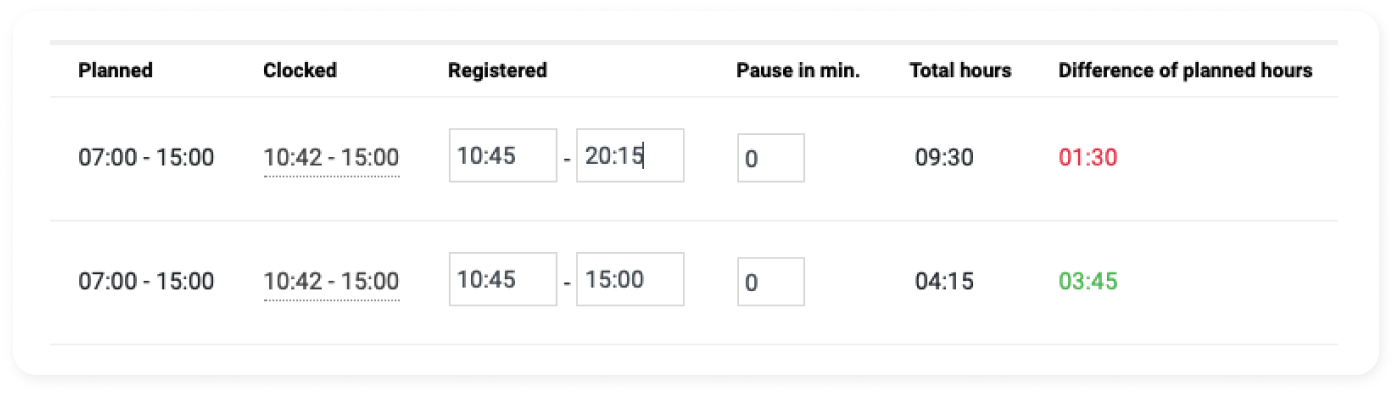
3. Planned: here are the planned hours for the shift of the employee.
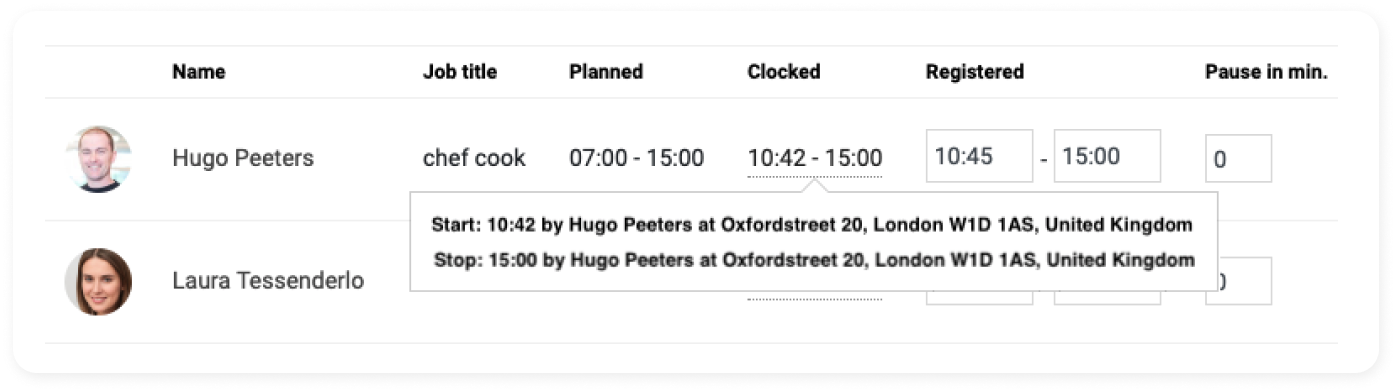
4. Clocked: if the employee clocked in & out via the application or via the time clock, you can consult this here.
CrewTip! Move your cursor over the clocked hours, and you can see where the employee has clocked.
5. Registered: The fields in which managers can select which hours should be registered. As soon as you complete the time registration, these times are used as start and end times.
6. Break: in this field you can enter a break time in minutes.
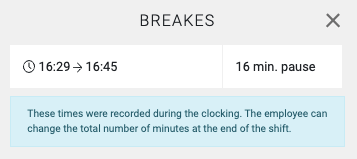
CrewTip! If you are using the break timer in the application, your employees can also register their break (s) during their shift. The clock icon indicates that a employee has registered a break using the application:

If you consult this, a pop up will appear with the total number of break minutes.
7. Total hours: this field shows the total number of registered hours minus the break time.
8. Difference planned hours: this field shows the difference in planned hours. If fewer
hours are performed they are green, if more hours are performed this is red.
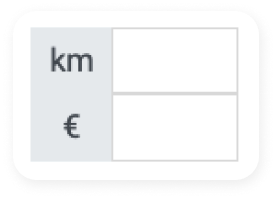
9. Declarations: these two fields are only visible if you are a payroll manager. Here you can enter the number of kilometers or a declaration amount. These fields are informative and can be exported with the report.
10. Rating: You can give a rating via the 5 stars that you will find here, this rating is not visible to the employee.

11. No show: through the icon on the right side, you can mark an employee as a No show.

After selecting this, a pop-up will appear asking you to confirm this No show.
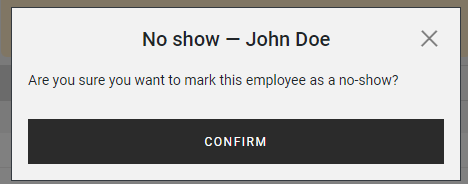
CrewTip! You cannot undo a No show! If extra modules are used such as Dimona's (BELGIUM) or Contracts, a cancel input will be generated automatically when a No show is confirmed.
12. Save: If you have made changes but do not want to complete the time registration yet, select SAVE at the bottom so that your changes will not be lost.
13. Submit review: As soon as all data in the time registration has been correctly adjusted or entered, select SUBMIT REVIEW. Time registrations for which a review has already been submitted, can still be modified through unlocking.
CrewTip! Once time registrations have been finalised, they can be consulted and exported via REPORTS.
Clocking in and out of employees
There are two options for employees to clock in and out.
This can be done with our built-in time clock, which allows employees to clock in and out with a selfie. The time clock is very useful for fixed locations where a tablet can be hung. hone settings, the location wi
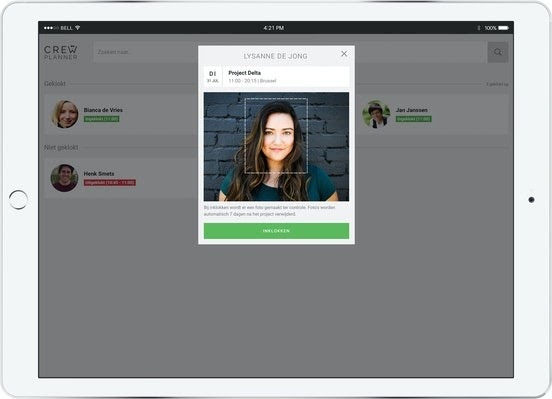
Another option is to let employees clock in and out via the application on a smartphone. If employees allow this via their phone settings, the location will also be shared with you.

A supervisor has the option of managing the time registration for colleagues on the same project via the application.
Submitting time registration review
As soon as you have finished processing the time registration, you can proceed to submitting the review for these performances. You do this by selecting SUBMIT REVIEW at the bottom.
The time registration is then processed and as soon as they have been finalised, you can consult and export the data in REPORTS in ADMINISTRATION.
Ratings and no shows
As we have already indicated, you can enter ratings, comments and no shows in the timesheet. If you are a payroll manager, you won’t only be able to consult this information in the in the time registration itself, but also in the employee pop-up.
A company manager is not able to consult employee data.
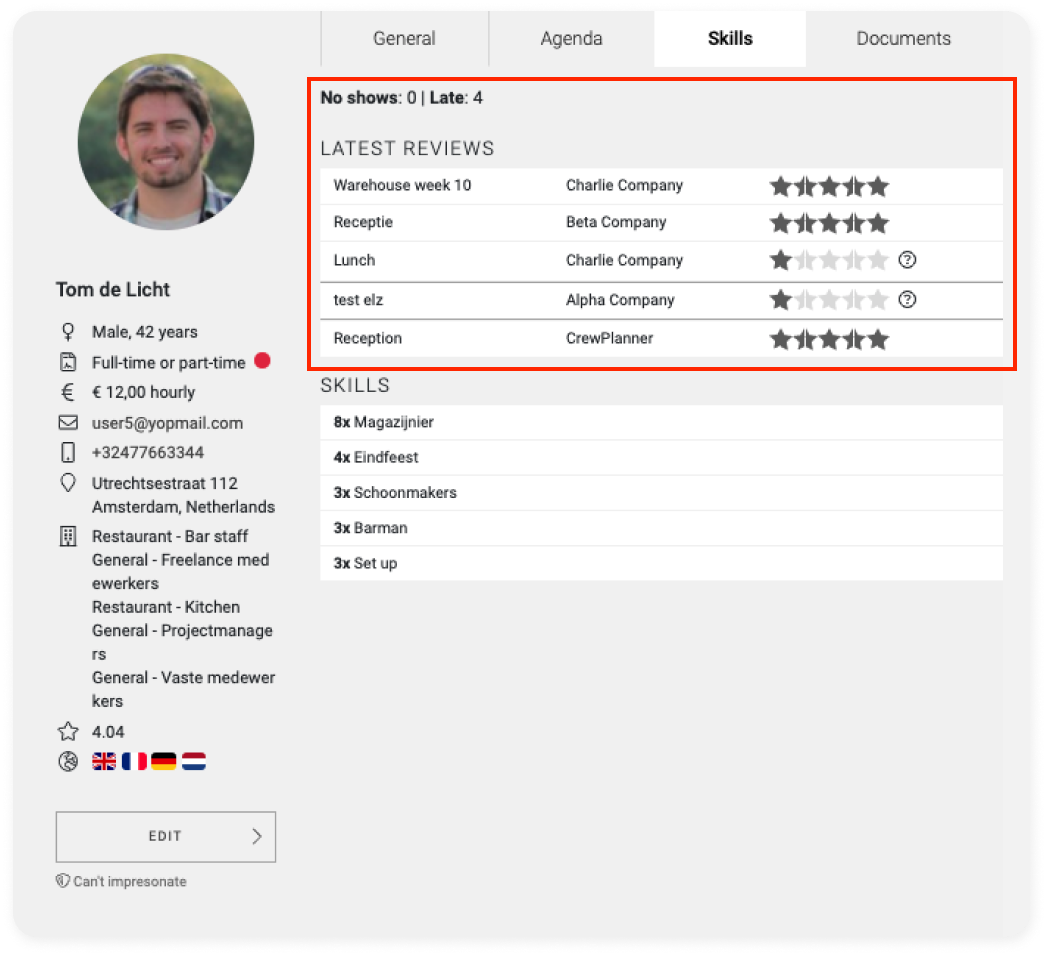
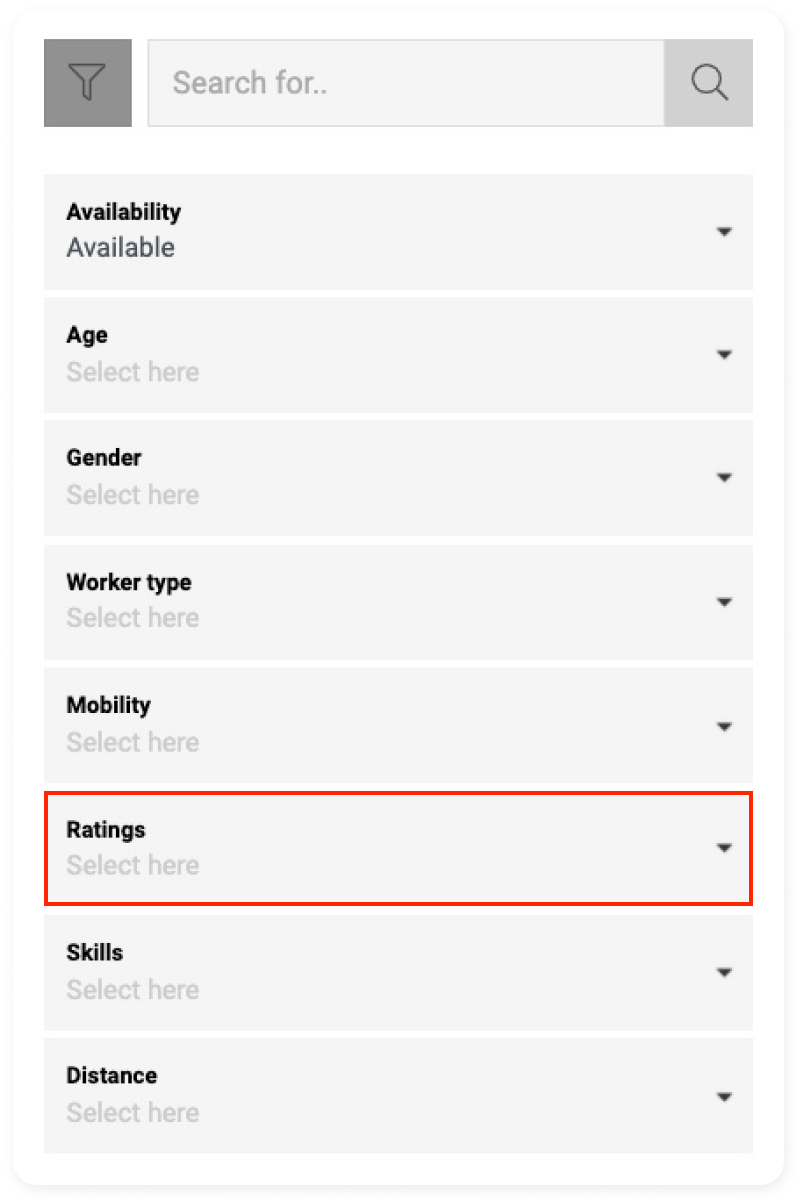
You can even use the assessments as a filter during scheduling, so you will only see those employees who are available with the filters you have applied.
Unlock time registration
As long as a time registration has not yet been finalised, it is possible for anyone to unlock it again. However, once the time registration has been finalised, only a manager with the authorisation Finalise time registrations can unlock it.
You unlock a time registration by selecting the project in the AGENDA, where in the tab TIME REGISTRATION the option UNLOCK appears at the top once a review has been submitted for the time registration.
After the project has been unlocked, the time registration can be altered again.
We hope this article has helped you!
If you still have questions, take a look at our Crew Academy first. You might find the answer in one of our articles.